Wednesday, October 31, 2007

Another ATC


I've noticed that the ATCs are usually pretty "artsy." Mine are just little mini cards. Oh well, they're still just so dang cute and fun to make!

Supplies (all Stampin' Up!):
Stamps: Best Blossom (retired), Print Pattern, Itty Bitty Backgrounds
Ink: Always Artichoke, Elegant Eggplant, Very Vanilla
Paper: Whisper White, Always Artichoke, Elegant Eggplant
Accessories: celery grosgrain, rhinestone brads - ice circles, white gel pen

Tagged by June

My friend June at Simply Elegant Paper Crafts has tagged me. Here goes ...

1. If you could have 100.00 worth of scrapbook paper or assorted embellishments, which would you choose?
Embellishments all the way, baby. I've got enough paper to cover the state of Virginia. Plus, when I shop the scrapbook stores, I've never hesitated to buy paper. It's the sensible, practical thing to buy. But embellishments? Too often I choke on the price. It would be fun to get the things I'd never buy for myself.

2. If you had to choose between using only stamps or rubons, which would you choose?
Oh need anyone ask? Stamps, stamps, just give me stamps.

3. If you knew how to do both awesome cards and layouts but could only do one for a whole year...which would you do?
Tough choice ... there is the speed and instant satisfaction of cards, plus it's always nice to give. That said, I'd have to go with layouts. The more memories I can record and stories I can tell for my kids, the better. And we're only talking a year here.

4. Would you rather own a scrapbooking store or have your own scrapping room at home...(can't have both he he he).
Scrapping room, definitely. I'm a messy crafter, not at all one to neatly pack everything away after every creative session. Thankfully, I have my own room. Without it, I wouldn't craft :/

5. What is your CURRENT cardmaking or scrapping style?
Ummm ... bi-polar? LOL. Seriously, it totally depends on the mood I'm in. I'd say my bread and butter style is traditional and classic (to borrow home decorating terms), but I like a little of the eclectic, shabby chic, and modern thrown in for variety from time to time.

Now I think I'm supposed to tag 5 more people, but I don't feel like I know that many bloggers yet. So I'll tag 3 friends who are all brand-new bloggers. Check out their blogs and give them a warm welcome!

Sue
Becky
Kim

Tuesday, October 30, 2007

Oh So Lovely ATC


No, I'm not tooting my own horn. It's the name of the stamp set, silly :)

Supplies (all Stampin' Up!):
Stamps: Oh So Lovely
Ink: Jet Black Staz-On, Always Artichoke, Ruby Red, Bravo Burgundy
Paper: Ivory Naturals, Mellow Moss, So Saffon, Always Artichoke
Accessories: Cranberry Stitched Ribbon, Glassy Glaze Enamel, paper piercer, hodgepodge hardware, edge distressor, aqua painter

I've never done an ATC before (artist trading card). Very fun! If you're not familiar with them, they're just ways artists exchange their work and share tiny bits of themselves. The only "rule" is size: 2 1/2" x 3 1/2." It makes for a fun-size little canvas, yet plenty of room for all your favorite techniques and embellishments.

Try one, then post a link to yours in the comments section of this post. If you already make these, post a link too. I'd love to see what you've done.

[Updated to add: This ATC uses the Cracked Glass technique, which is this week's technique challenge on Splitcoast. There's a great tutorial here.]

Monday, October 29, 2007

2007 Holiday Card Buffet


What is this?
I'm calling it a buffet because that's exactly what it is. I have eleven cards on the "menu." There is a wide variety of styles and colors - hopefully something for everyone! If you see a card to two (or eleven) that you like, you can order as many of those as you're ready and willing to make. When you arrive at class, you'll have a packet with all your card materials prepared and ready to stamp. How easy is that?

View the eleven designs right here in my previous posts, which show up below this one. I've included supplies and notes for each card, to give you an idea of how it's created, to identify features you might not be able to see in the photographs, and to indicate instances where your card/s may not look identical to the ones in my photos.

Cost?
$20 for the first 12 cards (there is a twelve-card minimum, and the first twelve must all be the same design)
$1.25 per card after that (additional cards must be ordered in multiples of 4).
Prepayment required. Sorry, no exceptions :) You can mail a check, or pay via PayPal.

When?
Friday, November 9, 7:30-11:30
Friday, November 16, 7:30-11:30
Friday, November 30, 7:30-11:30
Friday, December 7 and/or 14, 7:30-11:30 (if needed)
Come to as few or as many sessions as you like.

Where?
My stampin' studio.

Registration Deadline?
THIS FRIDAY, November 2.
To register, send me an email with your selections or post them as a comment here.
[EDITED TO ADD: Registration has closed for the November 9 and November 16 sessions. Register by November 15 for the November 30 session.]

Other:
If you happen to miss this deadline, but still wish to participate, please contact me. It may be that I'll have enough supplies for you, or it may be that you'll have to wait until the second session to begin making your cards.

Are Fridays bad for you? If so, please let me know. I am willing to add or change sessions, depending on what works best for everyone interested.

Holiday Card Buffet: Baroque Motifs


Stamps: Baroque Motifs, All-Year Cheer I/II/III (retired)

Inks: River Rock, Bravo Burgundy, Always Artichoke

Paper: Bravo Burgundy, River Rock, Always Artichoke, Ivory Naturals

Accessories: gold brad, scallop punch, spring bouquet punch, gold brad, wide chocolate grosgrain, dimensionals

Comments: One layer of the main image (the medallion) is hand-trimmed. The others are punched. The medallion is mounted on dimensionals.

Credits: designed from a Splitcoast sketch

Holiday Card Buffet: Heartfelt Wreath


Supplies:

Stamps: Heartfelt Thanks, Wonderful Words, Print Pattern Background, Itty Bitty Backgrounds

Inks: Always Artichoke, Bravo Burgundy, Encore Gold

Paper: Bravo Burgundy, Always Artichoke, Very Vanilla

Accessories: Burgundy Grosgrain, gold cord

Holiday Card Buffet: Hung Up on the Holidays


Supplies:

Stamps: Hung Up on the Holidays, Warm Words

Inks: Basic Black, Real Red, Blue Bayou, Wild Wasabi

Paper: wild Wasabi, Soft Sky, Whisper White

Accessories: Wild Wasabi double-stitched ribbon, dimensionals

Comments: The ornaments are hand-trimmed and mounted on dimensionals.

Credits: This card was designed by Kristina Werner. Check out her blog: kwernerdesign.com.

Holiday Card Buffet: Lovely As A Tree


Supplies:

Stamps: Lovely As A Tree, Wonderful Words (retired), pine wheel (retired)

Inks: VersaMark, Handsome Hunter wheel cartridge

Paper: Handsome Hunter, Bravo Burgundy, Basic Black, Gold Metallic

Accessories: Gold embossing powder

Comments: This card has a wheeled background as well as an embossed main image and sentiment.

Holiday Card Buffet: Big On Christmas


Supplies:

Stamps: Big On Christmas

Inks: Basic Black

Paper: Old Olive, Real Red, Whisper White, Dashing Designer Paper

Accessories: Ticket corner punch, red grosgrain ribbon, olive wide grosgrain ribbon (not pictured), old olive, real red, summer sun markers, dimensionals

Comments:
* The Christmas tree that makes the "A" in "Happy" is hand-trimmed and mounted on dimensionals.
* There are three images in this set. All three will work with this design. The other two say "Noel," and "Let It Snow."
* Your cards will use olive wide grosgrain ribbon in place of the red narrow grosgrain shown. (I think the contrast will look much better - just don't have any in stock yet!)
* There are twelve papers in the Dashing paper pack. Your cards will use several different patterns, not just the one shown here.

Holiday Card Buffet: Peaceful Wishes


Supplies:

Stamps: Peaceful Wishes

Inks: Handsome Hunter, Chocolate Chip, Bravo Burgundy, Mellow Moss, Very Vanilla

Paper: Mellow Moss, Handsome Hunter, Ivory Naturals

Accessories: Stampin' sponges

Comments: The outer edges of the main image are sponged in Handsome Hunter ink.

Holiday Card Buffet: Perfect Presentation Snowflake


Supplies:

Stamps: Perfect Presentation (hostess), Happy Everything

Inks: Blue Bayou

Paper: Blue Bayou, Soft Sky, Whisper White

Accessories: Cuttlebug Snowflakes Embossing Folder, 1 1/4" square punch, 1 3/8" square punch, 3/4" circle punch, Blue Bayou double-stitched ribbon, dimensionals

Comments: The dry embossing is done with a Cuttlebug machine. If you've not used one before, they are quick and easy to use. The blue stamped snowflake image is punched with a 3/4" circle punch and mounted on dimensionals.

Holiday Card Buffet: Perfect Presentation Tree


Supplies:

Stamps: Perfect Presentation (hostess)

Inks: Wild Wasabi, Handsome Hunter

Paper: Certainly Celery, Handsome Hunter, Wild Wasabi, Whisper White

Accessories: Wild Wasabi Double-Stitched Ribbon

Comments: The tree is hand-trimmed and mounted on dimensionals.

Holiday Card Buffet: Snow Burst


Supplies:

Stamps: Snow Burst, Season's Greetings (retired)

Inks: Certainly Celery, Sage Shadow, Always Artichoke

Paper: Always Artichoke, Certainly Celery, Whisper White, Wintergreen Designer Paper

Accessories: 1 1/4" circle punch, 1 3/8" circle punch, gold brad

Comments: This card showcases two of the twelve paper designs in the Wintergreen pack. Your cards will use all of the papers, so not every card will look identical.

Credits: created using a sketch by Jen del Muro. Check out her blog: i{heart}tostamp.com

Holiday Card Buffet: Snow Flurries


Supplies:

Stamps: Snow Flurries, All Year Cheer I/II/III (retired)

Ink: Bravo Burgundy, Always Artichoke, Bashful Blue

Paper: Bravo Burgundy, Always Artichoke, Whisper White

Accessories: Burgundy Grosgrain

Comments: A quick and simple, yet stylish card.

Holiday Card Buffet: Wintergreen


Supplies:

Stamps: Cute Converse (retired)

Ink: Always Artichoke

Paper: Sage Shadow, Always Artichoke, Certainly Celery, Wintergree designer paper

Accessories: Ticket corner, small oval, 1" circle, designer label, 1/8" circle punches, celery grosgrain ribbon

Comments: The Wintergreen designer paper pack has twelve different designs in this color palette. Your cards will use all twelve patterns. They will not all look identical.

Credits: The layered punch idea is from Beate Johns. Check out her blog, fresh & fun.

Saturday, October 27, 2007

Today's Yummy Project

No stamping today :( Not yet, anyway.

But, I did get to make something cool -- apple butter, the old-fashioned way, in huge copper kettles over an open fire. It's a tradition in my mom's family that I can remember doing every few years since I was a tot. We started last night with 8 bushels of apples and finished late this afternoon with 67.5 quarts of applebutter. A fun day back home with family.


Yum!

Friday, October 26, 2007

61 Days Until Christmas


Remember my idea to make a Christmas countdown jumbo clothespin?

Decorating the clothespin itself was easy-peasy. And I got away with covering only the front, since they were already painted white. (I got them in a 3-pack from Oriental Trading Company.)

The spiral-bound countdown part was a little more involved. I started with a blank white 4" chipboard coaster and covered it with Stampin' Up!'s "Dashing" designer paper. The tree is from Perfect Presentation (hostess set). "Days" is stamped using Alphadots (retired).

The stamp I used for "until Christmas" is also part of Perfect Presentation. The full stamp has the words "Do not open until Christmas" around the outside of the poinsettia. I colored it with markers so I could leave out the words "do not open, " then filled in the empty space with some paper piercing.

I don't have any good number stamps, so I printed the countdown numbers in Franklin Gothic on the computer. Both the tens and the ones digits have all numbers 0 through 9, so the countdown calendar will work up to 99 days before Christmas.

The spiral binding is from Staples. I actually pulled it out of one of my old Stampin' Up! catalogs that Staples spiral-bound for me. I'm sure someone out there knows a better way to do this. I know there are machines, the Bind-It-All or something? Tell me, pretty please, do I need a new tool? :D

I used the holes from the catalog (where the binding had been) to mark the coaster, then punched with my Crop-A-Dile. (Just got that last week. Do I love it or what?) I also punched the stacks of numbers. Last, lined up everything and twisted that binding through.
The nice thing? After Christmas, swap out the coaster for a favorite photo, and you have a nice year-round accent.

Peek-A-Booglie


I'm enjoying all the stamping challenges at Splitcoaststampers (they have one almost every day). Monday's "Technique Lover's Challenge" was to make one of these peek-a-boo boxes. Aren't they darling?

Supplies:
Stamps: Booglie Eyes, All Year Cheer
Ink: Basic Black
Paper: Basic Black, Only Orange, Halloween Night dp
Other: designer label, 1" circle, small oval punches, black gingham ribbon, 1/8" punch, paper piercer

You can find the instructions and templates here.

GREAT News: SU's Angel Policy

I am wetting my pants over this one ...

Beginning November 15, stampers will be able to sell their handmade items that use Stampin' Up images both online AND at "fixed retail locations." Currently, both are prohibited, which has really put the kibosh on selling anywhere other than craft shows.

In case you're interested, the change applies to Article 4, which on 11/15 will read:

4. Completed, hand-stamped projects may be sold at competitive and non-competitive permanent retail locations, as well as temporary craft events, community fundraisers, and over the Internet. In selling handstamped projects, the seller must make it clear that the items are hand-made, and not a product of the company. The seller may indicate that the supplies used are from Stampin’ Up!, but the Stampin’ Up! logo may not be used in any way for the sole purpose of promoting the sale of hand-stamped projects.

There are still rules to follow. Go to the Stampin' Up! website, click on "Legal," and from there, you'll be able to find the full Angel Policy.

Let the fun begin!

Teacher Treat


I'm making these altered Starbucks Frappuccino bottles for my kids to give to their teachers for little Halloween gifts.

It would be great do do something similar for all the teachers (from the PTO), maybe as a Valentine's gift, or a spring gift, but I'd need more than 60 empty bottles. That's a problem. I'm certainly not going to be the one to empty 60 of them, maybe one or two here and there, but not 60 ... too much caffeine and too much fat. So if you live nearby and you ever drink these, even just one or two, please save your bottles for me!

Supplies (Stampin' Up!):
Stamps: Tags So Much (retired)
Paper: Halloween Night designer paper (retired)
Inks: Basic Black
Ribbon: Orange, black gingham, green galore, Vintage Violet (retired)
Other: corner rounder punch (to make the scallops)

Thursday, October 25, 2007

Six Months Old!


Wow, my baby was a big six months old yesterday. So hard to believe. Equally hard to believe is how the gifts keep coming in -- he got another on Sunday. Our friends and family are fabulous!

This is one of two different thank-you designs. I do like the card (a lot), but can I tell you how tired I am of looking at it all these months? This design was actually the inspiration for this Halloween card I posted earlier this month.

Supplies (all Stampin' Up!):
Stamps: Wild Things, Canvas, Just Jeans, Riveting
Inks: Bashful Blue, Certainly Celery
Paper: Bashful Blue, Certainly Celery, Barely Banana, Whisper White
Accessories: Word Window, scallop, 1 1/4" circle, 1 3/8" circle punches, Soft Subtles brads


He wants you to see his cool socks :)

Wednesday, October 24, 2007

Another Sketch Challenge


This card was for Beate's Weekend Sketch Challenge #24. Can you tell I love sketches?

I had a really hard time getting this card to come together. At first, my plan for this star stamp was a super sleek, minimalist design - just the image, then the star cut out and popped up, all on a plain white background. Well, it was sleek and minimalist alright ... and BORING! I always admire the designers who can make a really, really simple card that looks amazing. Clearly I'm not one of them :(

So I brought in some color, did my usual adding, layering, and general fussing, and then adapted it to Beate's sketch. In the end, it was worth the fuss. I'm glad I flexed some creative muscle and pushed this through to the end. It would have been easy enough to quit mid-design.

Tuesday, October 23, 2007

2 For Tuesday


Last Thursday's challenge over on Splitcoast was to find a way to use wood. This was just the push I needed to alter one of the jumbo clothespins I had on hand. Wouldn't this be neat as a Christmas countdown, too? Decorate with holiday papers, and in the clip have the number of days left until Christmas? I'll have to give that one a try. Might make a good gift ...

Supplies (Stampin' Up! unless otherwise noted):
Paper: Outlaw dp
Ink: Chocolate Chip (for distressing edges of dp); White, Chocolate Chip, Sage Shadow craft ink
Other: Pewter Hodgepodge hardware (spiral clip); chocolate grosgrain ribbon, moss gingham ribbon, On Board Blossoms & Basics chipboard, large deco brad - source unknown, jumbo clothespin from Oriental Trading


This second project is for Jen del Muro's weekly sketch challenge. Wanna play too? Check out this post at i{heart}2stamp for the sketch details. You'll see I not only used her sketch, but I also picked up the colors and theme from her sample. As they say, imitation is flattery. And her work IS amazing!

Supplies (SU!):
Stamps: Snow Burst, Season's Greetings
Inks: Always Artichoke, Certainly Celery, Sage Shadow
Paper: Always Artichoke, Certainly Celery, Wintergreen dp
Other: gold brad, dimensionals

Monday, October 22, 2007

Trashy

Last month, when I was taking Gretchen Schmidt's "Creativity: A Daily Dose" class at Big Picture Scrapbooking, one of the altered projects was a door hanger. At first, I was going to make something for my daughter's room, like maybe her name on one side and "the diva is IN" on the other.

Even better? Her name on one side, and "pout in progress" on the other, since the only time she shuts (slams?) her door is when she's gone off for a pout.

In the end, I thought a "trash" sign would be much more useful. Our trashcans hide behind a cabinet door in a pull-out drawer of sorts, so our guests can never find them. Now I have a sign AND the prettiest trash in town ;)

Supplies (all Stampin' Up!):
Stamps: Baroque Motifs
Ink: Old Olive , VersaMark
Paper: River Rock, Brocade Background designer paper
Accessories: Vintage Brads

Sunday, October 21, 2007

To the Musicians


I'm SO excited! This is my first-ever attempt at digital scrapbooking! One day I may look back on this and cringe, but hey, we've all gotta start somewhere.

Technically, not quite my first-ever page. I signed up for a Renee Pearson digital class (through Big Picture Scrapbooking) back in April, knowing I was going to have a baby in the middle of it. I figured I could download the materials and learn at my own pace. Have I? No. I did the first assignment, so technically THAT was my first-ever page. But it was spoon-fed to me, so I can't really count it now, can I?

Here's the story on this layout ... my dd, Miss Adrienne, and I had a funny conversation the other day. It went like this:

Adrienne: Mommy, we learned about dinosaurs today at school!

Me: Really? ... well Adrienne, what did you learn? Are dinosaurs big or small?

Adrienne: Some are big and some are small.

Me: Do they fly?

Adrienne: Some do, some don't.

Me: Are they friendly?

Adrienne: Some are, some aren't.

Me: What color are they?

Adrienne: All colors.

Me: Do they eat people?

Adrienne: Some do, some don't.

Me: I'd like to see a dinosaur. Where can we go see one? At the zoo?

Adrienne: No, you can't see them at the zoo, mom. You have to go to the musicians.

Hmmm ... would I find them next to the strings or over by the woodwinds? ;)

Seriously, these are the little joys I like to scrapbook. And we all know kids are full of funny little sayings, misspeaks, hilarious non-sequiturs, etc. I've always *thought* about making a layout or mini-album of these collected funnies. Today seemed like a good time to start. And it seemed like a good thing to do digi.

I scrounged around my hard drive, looking through a few free kits I've downloaded here and there, and I found this cute little kit I got from Mosh-Posh when I was a kit subscriber. It's called George Frog and was designed by Linda Barber. I also stumbled on a layout template on Sarah Vrolyk's blog that I tried to use for this layout.

Yes, "tried. " Did I mention I have next to no idea what I'm doing? I'm sure had I known how, I could have easily dragged and dropped my elements into the design using her template file, but I couldn't get that to work like I thought it should. So I ended up creating all my elements on my own and then arranging everything according to her design. But I'm gonna figure this out, I am!

Anyway, it was fun! I can't see ever giving up the tactile pleasure of working with actual paper, ribbon, stamps, etc., but I figure it can't hurt to have another "tool" at my disposal. And there's something kinda compelling about scrapbooking in the airport, in the car, at baseball practice ...

Saturday, October 20, 2007

Virtual Stamp Night


Hey there, last night I did something new ... I participated in Splitcoast's Virtual Stamping Night. Actually, it was a "mini" VSN. Not totally sure what that means, but the "big" one is coming in January I think.

Anyhoo, for this one, there were four different challenges. I'm assuming a regular VSN has a lot more, and I hear there's a 45-minute time limit on each challenge, too. Sounds fun!

Since I didn't set foot on the steps down to my craft room until 11:30 pm, I really only had time to participate in one. I'm a sketch freak, so that's the one I chose. And this is the card I made.

Some American Crafts designer papers were on my work table already, so I went with them. I like how everything came together!

Supplies (all Stampin' Up! unless otherwise noted):
Stamps: Garden Silhouettes, Linen background
Ink: Chocolate Chip, Old Olive, Soft Sky
Paper: Whisper White, Old Olive, Chocolate Chip, Soft Sky, American Crafts "Metropolitan" dp
Accessories: Slit punch, ticket corner punch, "ice" rhinestone circle brads, polka dot ribbon (source unknown), dimensionals

Friday, October 19, 2007

Birthday for a Princess


Ack! My little girl turns 4 two weeks from Saturday! I had to crank out her invitations so I could get them in the mail!

I was drooling over some new Heidi Swapp pink bling in the shape of princess crowns (saw them in a magazine ad), BUT ... no time to drive around town looking and definitely no time to order and wait for shipment.

I had to go with the "use what you have" method. Not that I have any actual experience with that. Don't we make so that we can buy?

Gosh, let me see, what did I use here? (All Stampin' Up unless otherwise noted.)

Stamps: A Little Love, Sincere Salutations
Paper: Shimmery White, Pretty In Pink, Basic Black
Ink: Black Staz-On
Other: Pretty In Pink marker, slit punch, Cuttlebug "Textile" embossing folder, and Heidi Swapp pink jewels

It's a hard card to photograph. In real life, the card just shimmers from that Shimmery White paper. I'll udpate if I can get a better photo. In the meantime, click on the image for a close-up.

Sparkly, yet sweet, just like my little girl :)

Thursday, October 18, 2007

October Teacher Appreciation


I love it when volunteering and playing are the same thing! I serve on the teacher appreciation committee for the PTO at my son's school. Every month, we put together a little something for the staff as a token of the PTO's thanks.

This month, we're doing a simple sour cream box with a bite-size candy bar inside. I used Stampin' Up!'s Spooky Spiders Wheel with black ink to cover a whole 8 1/2 x 11 sheet of white. Then I used the small circle shadow stamp from Little Pieces to highlight the actual spiders in orange ink. I was able to create four favors out of each full sheet.

We make around 60 treats each month. Of course we're on a budget, so this was a great project -- fast AND economical. If you have cute project suggestions, please leave me a comment. I'm always looking for new ideas. My oldest is in first grade, and my youngest isn't even 6 months old. I have TEN more years of elementary school!


Wednesday, October 17, 2007

A Big Thanks!

I have to admit I had no real intention of starting a blog last week. This was supposed to be just practice for a "someday" when I was ready. What happened was that once it was created, it seemed silly not to put it out there. What was I going to do? Talk to myself?

I told just a few friends first. One of them was June, who told her friend Tracy (who I also know). Those two fantastic and talented women have been SO supportive that I want to give them both a quick public thanks. I don't think a post has gone by that one or both haven't left a comment on. Both have given me mentions on their blogs. And June was even so sweet as to nominate me for an award. How crazy is that? Me bein' a newbie and all ...

So to June and Tracy -- thanks for the very warm welcome to blogging, and for those friends of yours who have now crossed my path. I am richer for it.

I also want to say hi to Jimmi Mayo of Stampin' and Shoppin'. She stumbled on my (also brand-new) gallery at Splitcoast Stampers and sent me the sweetest message asking if she could reference my gallery and blog on her blog. And she didn't just include a link in her blogroll; she gave me the sweetest mention in one of her posts, just full of wonderful sounding superlatives. I'll try to live up! Be sure to check out both her blog and her SCS gallery. Talk about some gorgeous work!

Jinkies! Is That a Card?


I was attempting to purge some craft supply overflow last night. (I've now taken over all four closets in my basement, and two of them are 6 feet wide. I'm so bad!) Anyway, I stumbled upon this card I designed a couple of years ago as the invitation to my son's Scooby Doo birthday party. What a hoot!

The van itself is on a Taken with Teal background. I layered Green Galore on top and cut the swirl edges freehand. I used one of the Stampin' Up! fonts for the sentiment. The orange flowers are from an older Daisy punch SU once carried. The wheels are black circles layered with an orange daisy and rims made with one of the stamps from Little Pieces.

My favorite part is the photo of my son "driving." I trimmed around his silhouette, then stuck him on vellum to make the window. When I took the picture, I didn't tell him what it was for, so it was a surprise when I showed him the completed invitation the next day. So fun.

Tuesday, October 16, 2007

Baby Congrats


Congratulations to my friend Cori and her new baby girl, born Sunday. I used Jen del Muro's sketch to make this welcome card for their family.

Supplies used:
Stamps: I'm Here, Warm Words
Ink: Purely Pomegranate, Basic Black, VersaMark
Paper: Certainly Celery, Basic Black, Pretty In Pink, Purely Pomegranate, Whisper White
Accessories: paper piercing tool, silver brads, ticket punch, Purely Pomegranate double-stitched ribbon, dimensionals

Monday, October 15, 2007

We Call 'Em Idea Books for a Reason :)


Check it out ... this card design was CASE'd from Stampin' Up!'s current Winter Mini-Catalog. It caught my eye because it was clean and simple, but also because it has an unusual off-center placement that I found interesting.

Supplies:
Stamps: True Friend
Inks/Markers: Old Olive, Cameo Coral, Close to Cocoa, Chocolate Chip.
Card Stock: Close to Cocoa, Cameo Coral, Old Olive, Apricot Appeal
Tools/Accessories: paper piercing tool, white gel pen, Scallop punch, Apricot grosgrain.

Here's the original card I copied ... I like how they look nearly nothing like each other :)

Saturday, October 13, 2007

A True[ly] Friend[ly] Set

Okay, I LOVE Stampin' Up!'s current holiday mini-catalog! My favorite set is True Friend. There are so many ways to use it.

Ever get tired of the standard 5 1/2 x 4 1/4 card size? Switch it up and go long ...


Supplies:
Stamps: True Friend, Linen, Three For You Punch Box (greeting)
Paper: River Rock Long Notes, So Saffron Designer Prints, So Saffron, Very Vanilla, Groovy Guava card stock
Inks: So Saffron, River Rock
Markers: Certainly Celery, Cameo Coral
Accessories: Paper piercer, slit punch, 1/16" punch

... or tall ...


Supplies:
Stamps: True Friend
Paper: Wild Wasabi Long Notes, Apple Cider Designer Paper, Very Vanilla and Close To Cocoa card stock
Inks: Wild Wasabi
Markers: Really Rust, Close to Cocoa
Accessories: Wild Wasabi Double-Stitched Ribbon


...or small!


Supplies:
Stamps: True Friend
Paper: Soft Sky Love Notes (3x3), Purely Pomegranate and Whisper White card stock
Ink: Purely Pomegranate
Accessories: Paper Piercer, 1 1/4" Circle Punch, 1 3/8" Circle Punch

And YES, Stampin' Up! has envelopes for these cards. If you get the pre-cut and scored long notes or love notes, you'll get the envelopes, too. If you make your own, use the Small Open-End Envelopes for the Long Notes and the Small Square Envelopes for the Love Notes.

Apparently, I'm Not the Only Adult Who ...


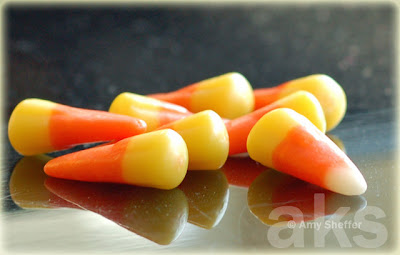
... actually LIKES candy corn! (Note: Has to be Brach's. Off-brands just don't cut it.) I hear there is a caramel candy corn now, too. I think I must find some!

Friday, October 12, 2007

Feels Like Fall To Me ...


The crisp air of Fall has finally made it to Virginia! My favorite time of year? It just might be.

I've been playing with some beautiful fall designer paper -- Stampin' Up's Apple Cider double-sided. For this card, I wanted to rough it up a bit, so I sanded the dp until some of the white core showed through. On the two striped squares, I added a very subtle swirl in Vanilla craft ink. It's hard to see, but the Really Rust base of the card is stamped with the Canvas background stamp using Really Rust ink. The card (4 3/4 x 4 3/4) is larger than the bg stamp, so I opted to stamp the background five or six times, each time at a different angle. I got full coverage and a lot of overlap. A lot of stamping for the, oh, 1 square inch of rust that actually shows, but I think it adds to the overall scuffed up look. I also sponged the edges with rust ink for more of the same look. I kept trying to add something else, ribbon, hardware, etc., but nothing really added anything. The only thing I might try would be to use the ticket punch on the four outside corners of the group of designer paper squares.

Supplies used:
Stamps: Baroque Motifs, Canvas background
Paper: Really Rust, Chocolate Chip, Very Vanilla card stock; Apple Cider designer paper
Inks: Really Rust, Chocolate Chip, Very Vanilla craft
Accessories: Vintage Brads, 1/16" Punch, Scallop Punch, Distressing Tool, Sponge Daubers

Thursday, October 11, 2007

Another Halloween Card


Supplies Used:

Stamps: Trick or Treat (retired), All-Year Cheer I/II/III (retired)
Ink/Markers: Pumpkin Pie, Old Olive, Basic Black
Paper: Pumpkin Pie, Old Olive, Basic Black, Halloween Night designer paper (retired)
Punches: Word Window, 1/4" Circle, 1 3/8" Circle, Scallop, 1/16" Circle
Accessories: Silver Brads

Tuesday, October 9, 2007

Memory Verse Tag Book

I'm supposed to memorize ten Bible verses for my Bible Study this fall, one each week. The study workbook (it's Beth Moore's Breaking Free study) even has little perforated, business card-size tearouts for each verse, so we can carry the verses with us until they're memorized. The first thing I thought was how much easier they'd be to memorize if I just "prettied up" the little cards a bit. Isn't everything easier when it's prettied up? And of course I was memorizing *while* I crafted :)

I used Stampin' Up!'s Spring Showers 2-sided designer paper and images from the Looks Like Spring stamp set.

Some of the inside pages of the tag book:


Booglie Eyes Swap Card

I'm not usually one for the cutesy stamps, but something about Stampin' Up!'s Booglie Eyes set grabbed my attention right away and didn't let go. After a year of resisting, I finally caved. This card, for my upline's group meeting tonight, is the first card I've made with it. The spider and greeting are just two images from the set, which also includes a witch on a broomstick, a vampire, ghost, mummy, frankenstein and a bat. Can't wait to play with the other images some more. This layout is just a larger version of the little 3x3's from yesterday. Both were inspired by Beate's Weekend Sketch Challenge #22.

It IS cute!


There's a funny story behind this little project. I believe my upline got this stamp set, called You're Neat, at the Stampin' Up! convention this past summer. Now, to each her own, so no offense if this set tops your list of favorites, but Sue dislikes this set so much that she refused even to mount it! Personally, it tops my least-favorite list, too!

Toni, one of Sue's downline, suggested that we pass around the set and see if we can create something cute enough to change Sue's mind and make her like this set. I wish I had a picture of the adorable card Toni created last month. I volunteered to take the set next, and this is what I came up with. I have to say it's pretty stinkin' cute! Still, not enough to make me buy it, though. I'll take it to Sue's group meeting tomorrow night, so we'll see what she thinks.

The little cards are 3x3. I made a matching tote to go with it. It's hard to see in the picture, but I used a reverse mask to cover everything except the inside of the kite, which I then stamped with the Canvas background stamp. Just a little "extra." What do you think?