Wednesday, September 27, 2017

Joyful Wishes - September SFYTT


Hey there, just wanted to share a quick card I put together using this month's Reverse Confetti Sketch For You To Try. There's time left to play along, but just a smidge, so hurry on over to the Reverse Confetti blog for all the details and the link-up. Contest closes at noon CT on the 29th!

Here's the September sketch:


For my take on the sketch, I picked out some of the images from the adorable new Christmas Bear stamp set, stamped them on Reverse Confetti's Cloud White card stock, and did some quick and loose watercoloring using Zig Clean Color brush markers and a water pen. I absolutely LOVE Cloud White for watercoloring. Looks and feels like traditional card stock, but blends like watercolor paper. (For Copic coloring and general stamping, choose the Premier Polar White.)

My sentiment is from Sentimental Christmas, and the stitched- and pinked-edge circle die is from the Fa La La Circle Confetti Cuts set.


I subbed a length of ribbon for the smaller rectangle panel on the sketch and tied on some string and jingle bells for the embellishment trio.


Stamps: Christmas Bear, Sentimental Christmas
Confetti Cuts Dies: Christmas Bear, Fa La La Circle 
Ink: Midnight
Paper: Cloud White, Premier Polar White, and RC Teal card stock; Very Merry 6x6 paper pad
Other: Zig Clean Color Real Brush markers, water brush, ribbon, linen thread, jingle bells, foam adhesive


Thanks for stopping in today! Hope you're having a great week!


Friday, September 22, 2017

Queen & Co. Shaker Tag Cocktail

I had two projects up on the Queen & Co. blog earlier this week, and thought I'd share them here, too. I'm having so much fun with the Shaped Shaker Tags kit. The kit comes with enough foam shakers for nine shaker tags, and also includes dies to match each tag shape. Foam shapes are available separately (i.e., without the dies) if you need to replenish!

My shaker projects tend to feature just one type of topping, but today, I'm sharing shaker tags that I've loaded up with a mixture of quite a few different toppings. I've left just enough space for the tags to shake; otherwise, they are filled to the brim with goodies!

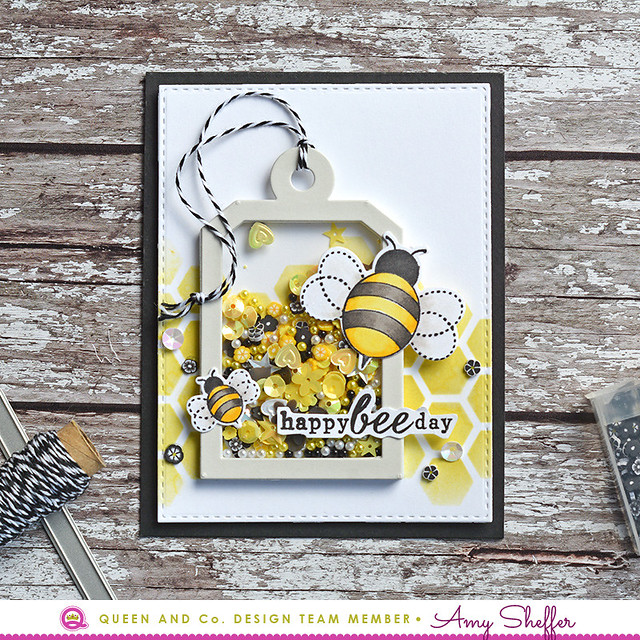
Happy Bee Day


First up is a happy "bee" day card featuring a mixture of black, white and yellow. I started by stenciling a honeycomb pattern  onto the background, then adhered the shaker foam right to that background. The different toppings are: yellow Bright Pearlies Toppings; black and white Matte Pearlies Toppings; black and yellow Posies Toppings; and black, white, and yellow Sequins Toppings.


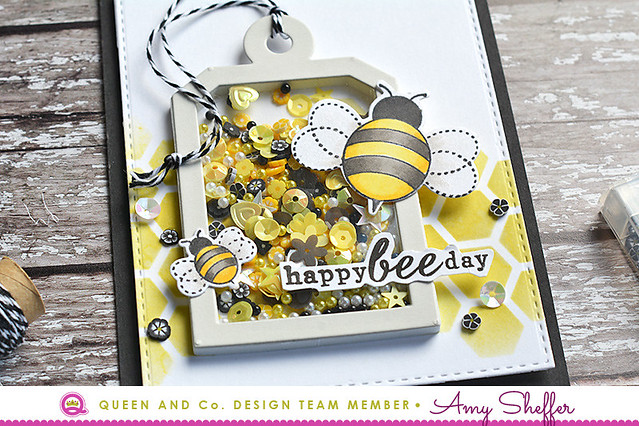
Happy Bee Day

I topped the tag with a light gray tag die-cut, a pair of stamped and die-cut bees, and a sentiment. I also used some of the toppings as embellishments around the shaker tag.


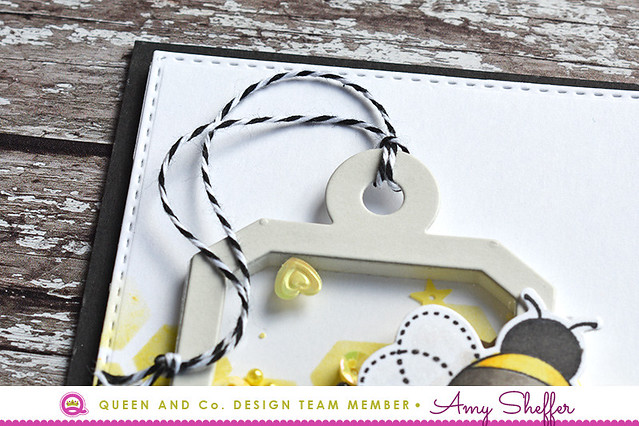
Happy Bee Day

Black and white twine from the Twine Assortment finishes off the tag.


Supplies:
Queen & Co.:
  Shaped Shaker TagsBright Pearlies ToppingsMatte Pearlies ToppingsPosies ToppingsSequins Toppings

Other:
Reverse Confetti The Buzz stamp set and The Buzz Confetti Cuts die set (Reverse Confetti); Simon Says Stamp Stitched Rectangles die set (Simon Says Stamp); Heidi Swapp Honeycomb Stencil, 6 by 6-InchFossilized Amber Distress Oxide ink; Memento Tuxedo Black ink; Copic markers; Zig Wink of Stella Glitter Clear Brush Tip Marker


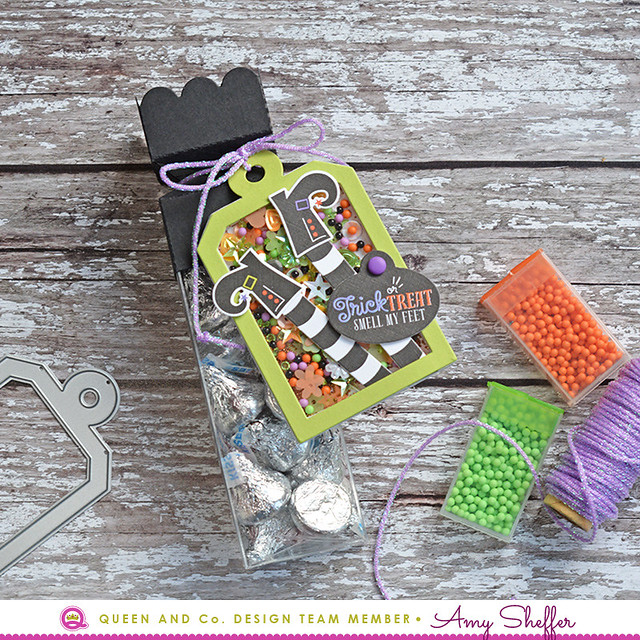
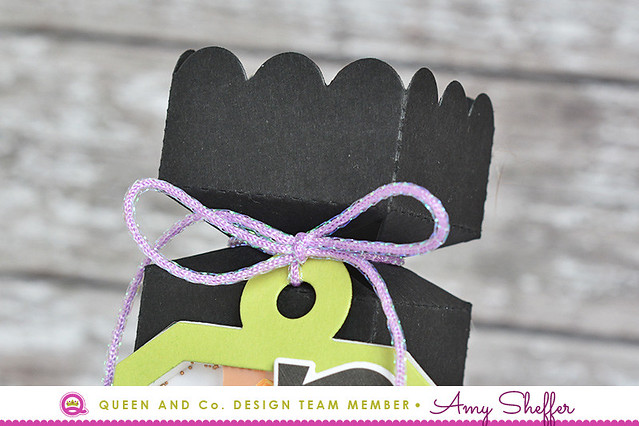
Trick Or Treet Smell My Feet

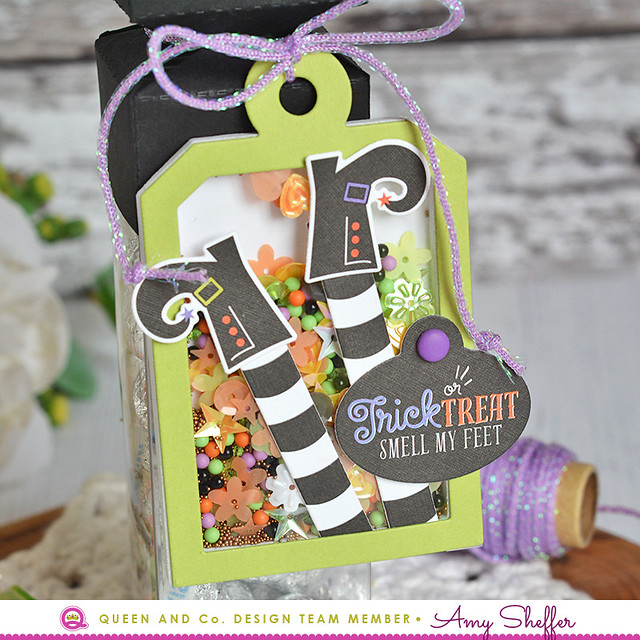
Next is a tag for a Halloween treat. I love this cocktail of orange, green, purple, black and white!


Trick Or Treet Smell My Feet

Here we have orange, purple and green Pops Toppings, green Pastel Diamonds Toppings; orange, green, and black/white Sequins Toppings, and orange Baby Beads.


Trick Or Treet Smell My Feet

Last, I used some Purple Sparkle String to attach the tag to the treat container.


Supplies:
Queen & Co.:
Shaped Shaker TagsPops ToppingsPastel Diamonds ToppingsSequins ToppingsBaby BeadsPurple Sparkle String

Other:
Make It Market Mini Kit: Halloween Pin-Ups, Green Parakeet Card Stock, and True Black Card Stock (Papertrey Ink); Treat Tube Topper Confetti Cuts,  Treat Tubes (Reverse Confetti)


Don't be afraid to mix your toppings or to fill your tags to the brim! For more Shaped Shaker Tags inspiration, visit the Queen & Co. blog.

Thanks so much for stopping by!


Tuesday, September 12, 2017

Teacher Thanks & Coach Thanks

Hi there, I'm over on the Queen & Co blog today to share more ideas for the Shaped Shaker Tag KitFor my family, September always means the return of school and sports. The teachers and coaches who pour themselves into our children's lives are heroes every day, and I honestly can't thank them enough! 

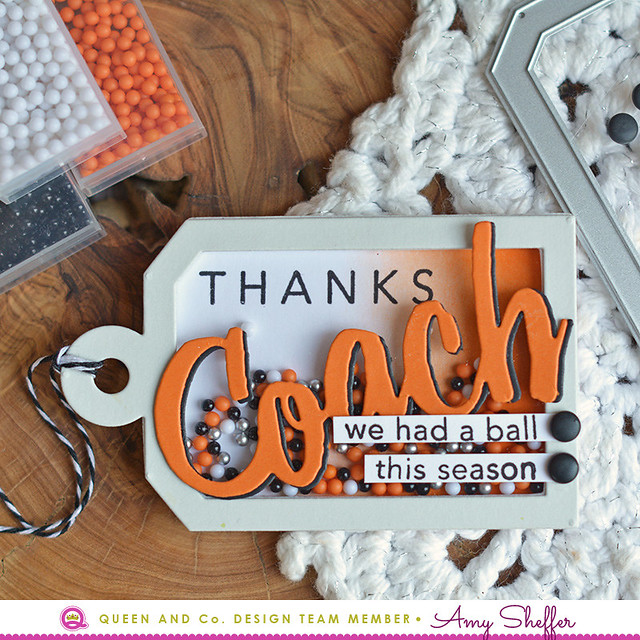
Thanks Coach

My first tag is a coach thank-you tag. With Queen & Co's rainbow of colors, you can customize colors to coordinate with team colors.The orange and white "balls" are from the Pops Topping Set and the silver and black ones came from the Pearlies Matte Topping Set

My sentiment is a combination of stamping and die-cuts, and I love how the sentiment goes with the "ball" toppings -- too fun!


Queen & Co. Supplies:
Shaped Shaker Tag KitPops Topping SetPearlies Matte Topping SetBlack Rivets

Other Supplies: 
Papertrey Ink Thanks Coach stamp set and  Thanks Coach die


Teachers Plant Seeds of Knowledge

Next is a sweet and inexpensive teacher gift. I love gifting little "everyday" and budget-friendly treats and trinkets that simply let someone know you're thinking of them!

There are three different tag shapes in the Shaped Shaker Tag Kit, which makes it easy to coordinate your tag shape with sentiment stamps you might already have. I was so excited to find that this sentiment, from an older Papertrey Ink set called Seeds of Knowledge, was a perfect fit for the circle tag.

I filled the shaker tag with clear diamonds from the Pastel Diamonds Toppings Set. The flower accents, also from Seeds of Knowledge, are stamped, die-cut, and adhered to the tag frame.

Teachers Plant Seeds of Knowledge

As you "shake" the tag, the rest of the sentiment is revealed.


Queen & Co. Supplies:
 Shaped Shaker Tag KitPastel Diamonds Toppings SetTwine Assortment

Other Supplies:
Papertrey Ink Seeds of Knowledge stamp set, Seeds of Knowledge dies,
Hibiscus Burst, Summer Sunrise, Raspberry Fizz, Tropical Teal, Canyon Clay,
Simply Chartreuse, and Ripe Avocado ink


Head over to the Queen & Co blog for more!


Friday, September 8, 2017

Papertrey Ink Traveler's Journal - Accessories & Embellishments

This is my second post today. For Reverse Confetti's September Release Hop, click HERE.


It's Traveler's Journal day over on the Papertrey Ink blog! This month's feature is all about accessories and embellishments. Right up my alley!


I had so much fun tricking out my Traveler's Journal with all sort of additions that are both pretty and functional. The first thing I wanted to make was a charm for the elastic closure. I wanted it to be durable, so I reached for some felt and searched through my stitching dies. I ended up finding this little football shape with coordinating scalloped mat layer in the Stitched Ornament: Classics die set.


On the white scalloped layer, I die-cut two slits for the slide using a die from the Coin Purse II set. 


The plain layer is cut from Spring Moss felt, and the monogram is cut from Lavender Moon felt with the letter A die from the Sew Stylish Alpha I die set.

I also decided to embellish the Outer Cover with some die-cut florals from the Grand Botanicals die set. I used Simply Chartreuse, Winter Wisteria and Lavender Moon felt plus white card stock for the detail layer. These felt diecuts are adhered to each other and to the cover with fabric glue.


Next I wanted to add some bookmark charms, and I found a really easy way to do them. I tied a length of True Black Baker's Twine to the inside elastic and then tied some felt buttons from the Bitty Button Stack die set to the ends.


Here's a closer look at where the twine is tied to the elastic.


When the bookmarks are placed, the little flower buttons hang out from the bottom like little charms. So pretty!


You'll notice I added a second layer of felt to the inside of my outer cover. I did this mainly to make the outer cover sturdier, but it also allowed me to stitch an accessory to the inside cover without the stitching showing through on the front. Here, I've added a simple band that I die-cut with one of the Stitched Tray: Rectangle Trim dies, and I'm using it for jumbo paper clip storage.

By the way, to add that inside layer, I first die-cut a second Traveler's Journal: Outer Cover in white felt, then just trimmed about an inch to the left and right of the spine. I machine-stitched the two layers together, leaving the edge next to the spine open for a pocket. 


Here's another look at the clip storage and the bookmark charms.


Last, I spotted these little button closure loops in the Coin Purse II die set, and thought maybe I could use them for pen/pencil storage. These loops won't work for all pens, but they do work for smaller pens, and they're perfect for my mechanical pencil.


Dies: Traveler's Journal: Outer Cover; Traveler's Journal: Page Blanks; 
Stitched Tray: Rectangle Trim Die; Stitched Ornament: Classics; 
Bitty Button Stacks; Grand Botanicals; Coin Purse II; Sew Stylish Alphabet I

Other: Aqua Mist, Spring Moss, Fresh Snow, Lavender Moon, Winter Wisteria, and Simply Chartreuse Felt; white thread; True Black Baker's Twine


That's it for me today! Be sure to visit the Papertrey Ink blog for links to all of today's Traveler's Journal projects!


Reverse Confetti September Release Hop


It's Release Day at Reverse Confettiand we are blog hopping to celebrate! All of the new products are now available!


I've got a couple more projects to share today, starting with the Leaf Lattice Cover Panel. So excited about this die!!


I adhered the white cover panel onto black card stock, then inlaid the "leaves" in the remaining colors. The black ones are coated in Hematite glitter. 


The sentiment, from Haunt It, is stamped onto a Midnight Tag Duo diecut and embossed in white.


Stamps: Haunt It
Confetti Cuts Dies: Leaf Lattice Cover Panel, Tag Duo
Ink: Versamark
Paper: Premier Polar White, Lime Green, Tangerine, Stone, and Midnight card stock
Other: white embossing powder, Charcoal Striped Twine, Hematite glitter


Next up is another Halloween creation:


I die-cut the Wonky Stripe Panel in Premier Polar White  left the negatives in place, and stamped my Haunt It sentiment in Midnight ink along the bottom. The MISTI really helped here, as it took a few impressions to get good coverage over the cut lines.


Next, I stamped and colored the darling mummy from last year's Best Witches and placed him onto a stitched circle that I die-cut using the Pop Up Circle die set.

I added a green mini clothes pin with Charcoal Striped Twine and some green Nuvo drops for little pops of color.


Stamps: Haunt It, Best Witches
Confetti Cuts Dies: Best Witches, Wonky Stripe Panel, Pop Up Circle
Ink: Memento Tuxedo Black, Midnight
Paper: Premier Polar White, Midnight, and Stone card stock
Other: Charcoal Striped Twine, mini clothespin, Nuvo drops, foam adhesive, Copic markers


For lots more new release inspiration, visit the Confetti Crew:


Thanks so much for stopping by!