Friday, June 30, 2017

Dream Big

Dream Big

I'm a wee bit addicted to these little square stickers from Jillibean Soup. They are actually part of the Day2Day planner line, so they fit perfectly in the day squares of the monthly calendar. Talk about adding some fun color, pattern, and motivation to your planner! But, gah, look how adorable they are on cards, too!

Dream Big

I accented each one with some embellishments, from both the Day2Day line and from the Bowl of Dreams collection: the tab sticker, puffy hearts and flowers ...

Dream Big

... wood veneer cameras and puffy feather stickers.

 I love the girly combination of patterns and colors, too, which came together by putting together papers from the Bowl of Dreams and Chit Chat Chowder collections.


Supplies:
Jillibean Soup:
Patterned Paper: Bowl of Dreams/Make Magic; Chit Chat Chowder/Churned Chit Chat
Wood Veneers: Bowl of Dreams
Puffy Stickers: Bowl of Dreams
Day2Day Planner Products: Stickers - Make It Happen; Sticky Notes - Arrows/Tabs
Embellishments: Pink Baker's Twine


Thanks for stopping by!


Thursday, June 29, 2017

Do What They Think You Can't Do

Do What They Think You Can't Do

This is one of the simplest cards I've ever made, and I love it! I wish you could have seen all the patterns and layers I messed around with before taking them all off and going with this simple white background. It felt like a breath of fresh air! Sometimes less really is more!


Do What They Think You Can't Do

The dreamcatcher is from the Bite Size Bits pattern in Jillibean Soup's Bowl of Dreams collection. There is also a similar dreamcatcher die-cut in the Bowl of Dreams Pea Pod Parts.  I don't have those yet, so I just made my own with a little fussy cutting! I added a sentiment sticker, puffy flower sticker, and some thin natural cord, layered that element over a stitched rectangle die-cut and called it done.

The links above, which go to the wholesale store, are for reference. Look for/ask for these and other Jillibean Soup products at your favorite retail store!

Thanks for stopping by!


Monday, June 26, 2017

Brave, Brilliant, Resilient - June SFYTT


The clock is ticking on Reverse Confetti's June Sketch For You To Try (SFYTT). We'd love to have you play along for a chance to win a Reverse Confetti gift certificate! Full rules and details, as well as the link-up are posted HERE on the Reverse Confetti blog. The contest closes Thursday, June 29 at noon CT.

Here's our June sketch:


And here's my take on it:

Brave, Brilliant, Resilient

My card is a little more stripy than the sketch, thanks to the Vertical Stripes Cover Panel Confetti Cuts die-cut in the background. The Lime Green hexagon panel was cut with the Hello & Thanks Label Confetti Cuts die set. I stamped the label with the "brave brilliant resilient" sentiment from One Day At A Time. And for the trio of circles in the sketch, I added the stamped and die-cut kite, from Take Flight, and a pair of white clouds from the Take Flight Confetti Cuts set. I kept things super clean and simple, with just a few clear sequins for embellishments.


Stamps: One Day At A Time, Take Flight
Confetti Cuts Dies: Vertical Stripes Cover Panel, Hello & Thanks Label, Take Flight
Ink: Midnight
Paper: smooth white and linen white card stock; Reverse Confetti Lime Green card stock
Other: Copic markers, clear sequins, foam tape


Thanks so much for visiting. For more SFYTT inspiration, visit the Reverse Confetti blog.

Have a great week!


Friday, June 23, 2017

Jillibean Soup June Cards

Life Is Always Better

I had some cards on the Jillibean Soup blog earlier this week and last week and wanted to share them here too! 

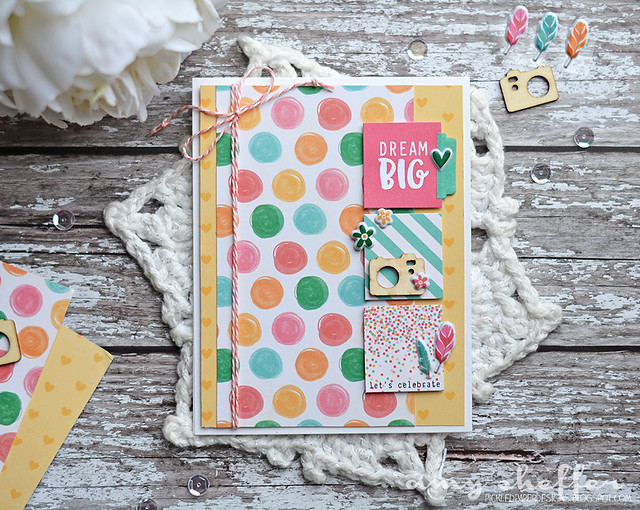
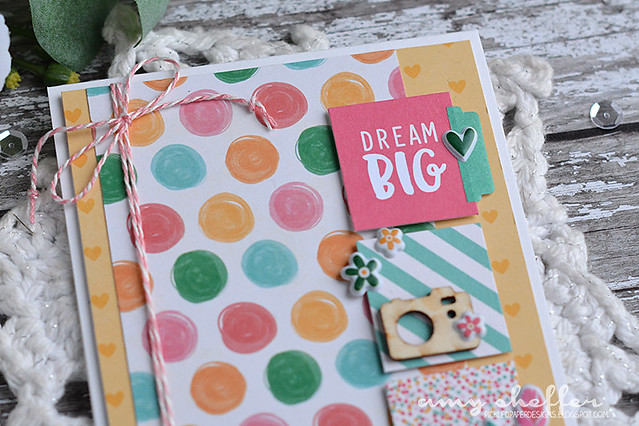
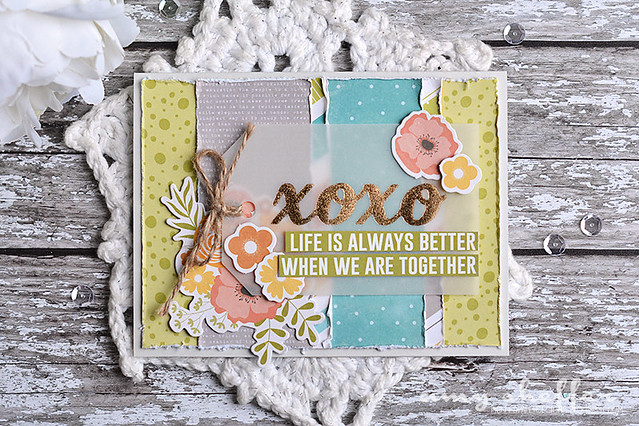
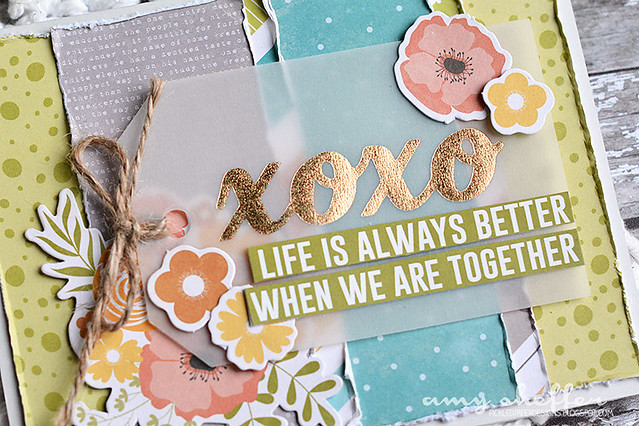
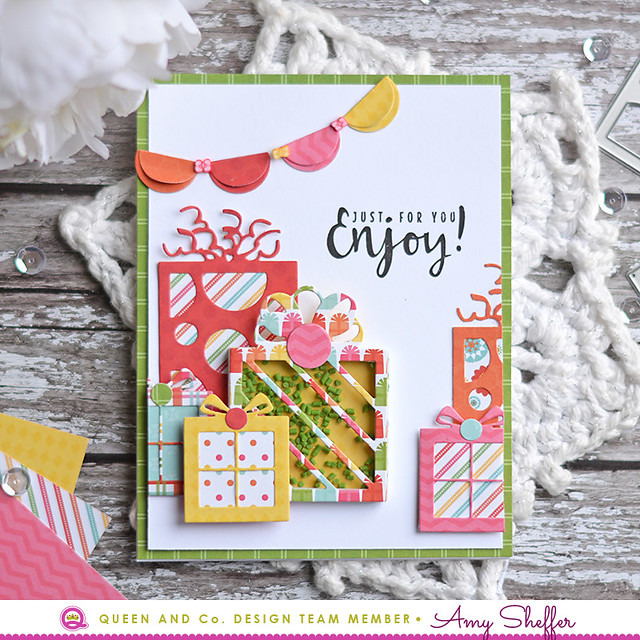
This first card features paper and embellishments mostly from the Hardy Hodgepodge collection, which is one of my all-time favorite collections. I just adore the colors! 


Life Is Always Better

I also love the 
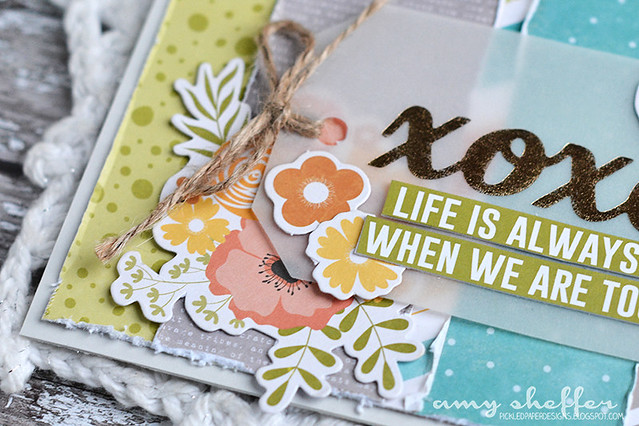
foiled vellum tags. The other words in the tag set are "love," "hello," "enjoy," "happy," and "thanks." They are gorgeous!


Life Is Always Better

The vellum tag allowed me to place the floral cluster die-cut behind the tag without completely covering it up (too pretty for that!).

Supplies:
Jillibean Soup
Patterned Paper:  Hardy Hodgepodge Soup/Pound of Pups, Handful of Hearts, Bite Size Bits; Bowl of Dreams/Think with Purpose
Coordinating Stickers:  Hardy Hodgepodge Soup
Pea Pod Parts:  Hardy Hodgepodge Soup
Tags:  Foil/Hello


Go Your Own Way

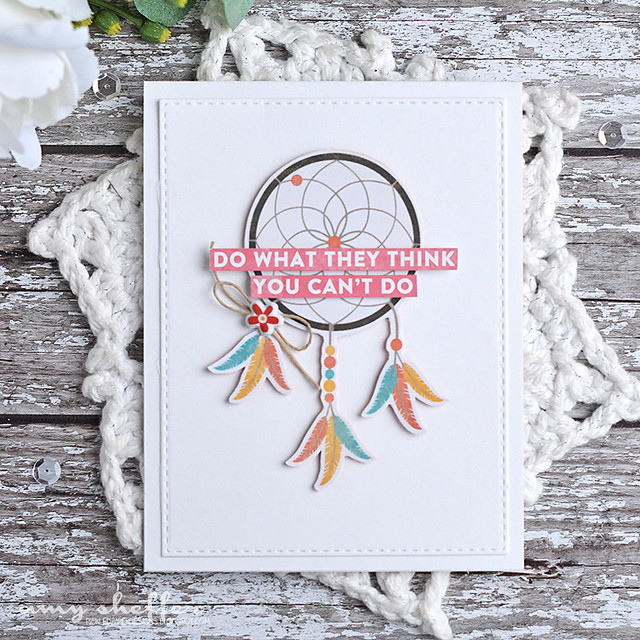
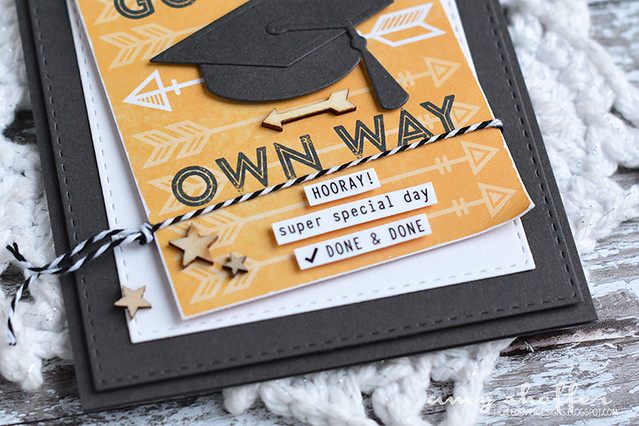
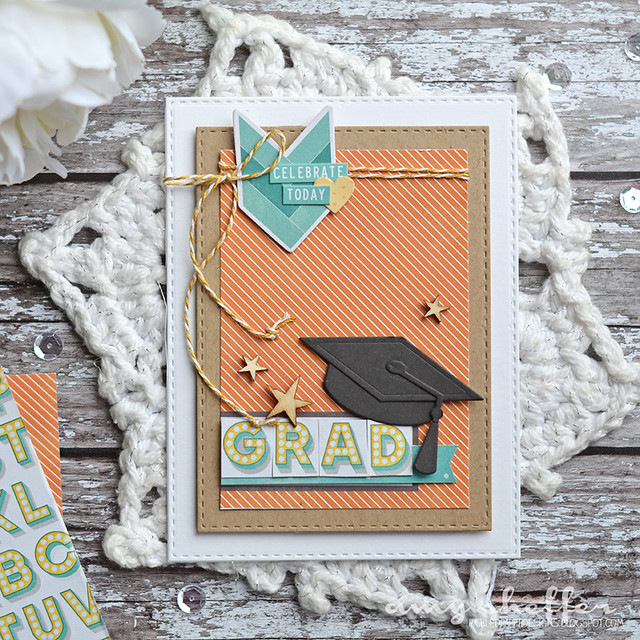
I know most graduations are past now, but I'll share these next two cards anyway. The yellow piece with the arrows is one of the Bite Size Bits (3x4 designs) from the Bowl of Dreams collection. 


Go Your Own Way

I added the graduation cap die-cut (from Taylored Expressions) and then a bunch of phrase stickers that are actually from Jillibean Soup's Day2Day planner product line. The stickers are clear, so I first adhered them to white card stock so they'd stand out better. 


Go Your Own Way

Last touch was to add some various wood veneers. Also, lots of stitched rectangle die-cuts for layers--must have dies for cardmakers, IMO!

Supplies:
Jillibean Soup
Patterned Paper:  Bowl of Dreams/Bite Size Bits
Wood Veneers:  Bowl of Dreams
Day2Day Clear Stickers:  Make It Happen

Other:  wood veneer stars, graduation cap die, stitched rectangle dies, black baker's twine.


Celebrate Today Grad

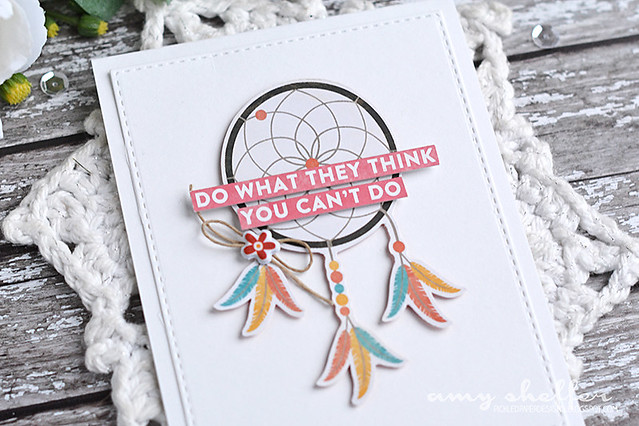
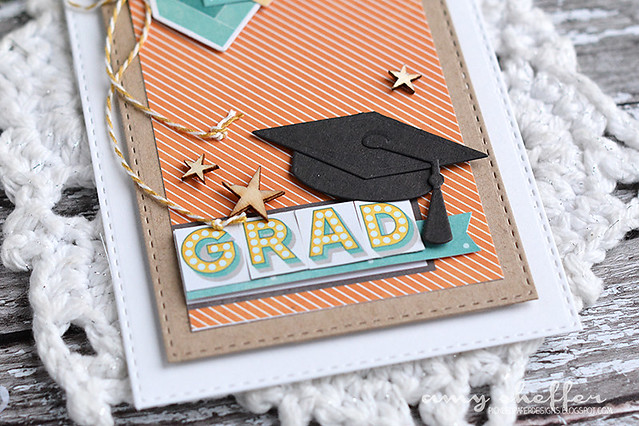
This next card began with the orange diagonal striped Hardy Hodgepodge Bite Size Bits. The design includes the white rectangle with the gray outline at the bottom, but says "the details documented." I adhered letters that I cut out of another pattern (Bit of Letters) to spell out "grad." 


Celebrate Today Grad

Another graduation cap die-cut and more wood veneers. (And more stitched rectangles!)


Celebrate Today Grad

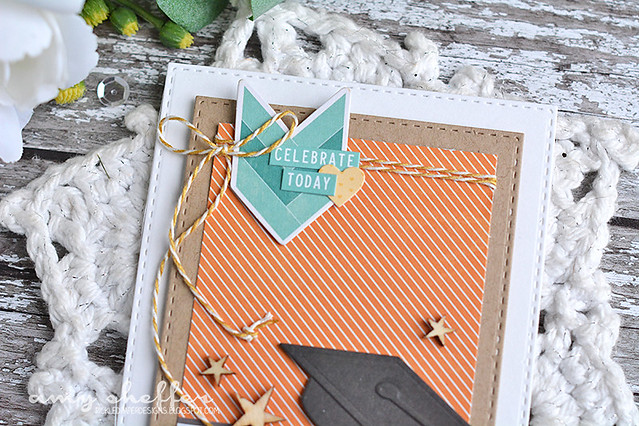
And finished the top with a Hardy Hodgepodge Pea Pod Parts arrow, some stickers and twine.

Supplies:
Jillibean Soup
Patterned Paper:  Hardy Hodgepodge Soup/Bits of Letters, Bite Size Bits; Bowl of Dreams/Think with Purpose
Pea Pod Parts:  Hardy Hodgepodge Soup
Coordinating Stickers:  Chit Chat Chowder
Wood Veneers:  Souper Celebration
Beanstalks:  Mustard Baker's Twine

Other:  graduation cap, stitched rectangle dies


Today Is Full Of Possible

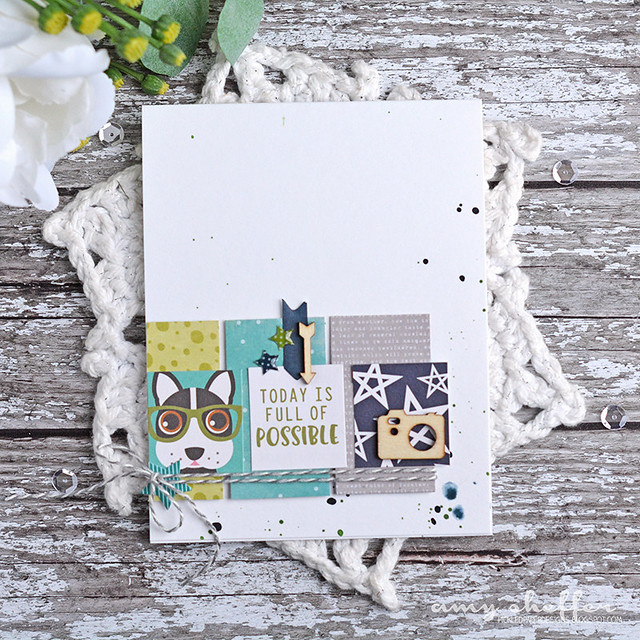
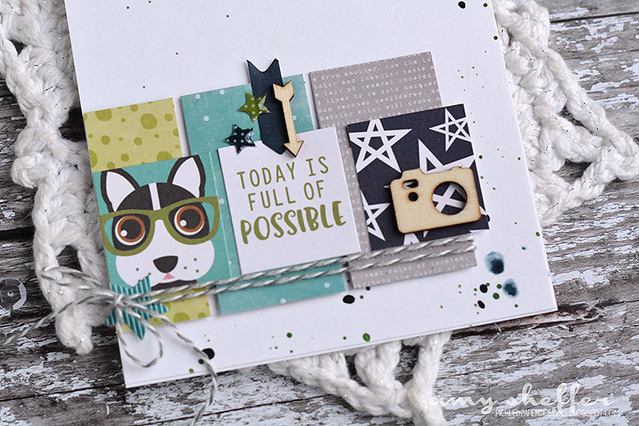
And last for today is a card that I made with little square stickers from the Day2Day planner line. I love using these on cards!!


Today Is Full Of Possible

Lots of little bits and pieces here: wood veneers, puffy stickers, twine, Happy Hues acrylic paint, and patterned paper.

Supplies:
Jillibean Soup
Patterned Paper:  Hardy Hodgepodge Soup/Pound of Pups, Bite Size Bits; Bowl of Dreams/Think with Purpose
Coordinating Stickers:  Hardy Hodgepodge Soup
Day2Day Epoxy Stickers
Day2Day Sticky Notes:  Arrows, Tabs
Day2Day Stickers:  Enjoy Today, Make It Happen
Wood Veneers:  Bowl of Dreams
Happy Hues:  Groovy Green, Bashful Blue
Beanstalks:  Gray Baker's Twine


Look for Jillibean Soup products at your favorite retailer or shop online in Jillibean Soup's online retail store.
For more Jillibean Soup project inspiration, visit the Jillibean Soup blog.

Thanks for visiting!


Wednesday, June 21, 2017

Creative Ways to Use Diecut Negatives - Queen & Co.

Hi there, I'm over on the Queen & Co. blog today with two ideas for using up all the little bits and pieces that are left over from the diecuts in the Pretty Presents Kit.

I'm talking specifically about the circles and half-circles from the large present and the diagonal stripe cut-outs from the medium presents.

Just For You - Enjoy!

For this card, I first arranged a large grouping of colorful gifts along the bottom. At the top, I made a banner out of half-circle pieces leftover from the largest gift diecuts. Adorable little bow toppings help to string together the banner pieces.


Happy Birthday To You

Next, I was looking at that pile of pieces left over from the diagonal stripe package and thought why not build a pretty pattern out of them? For interest, I arranged them facing different directions and at different heights.


Happy Birthday To You

I added a simple stamped sentiment across the grouping, and finished with some colorful circles, also leftover cut-outs from the diecuts, this time the large polka dot present die. Such a simple design, but colorful and fun! Hard to believe it, but there are 10 different patterns included in this one card design!

Supplies: Pretty Presents Kit, white card stock, black ink, foam adhesive.


For more information on these cards, visit the Queen & Company blog.

Shop the Queen & Co. store for the Pretty Presents Kit and hundreds of other shaker components, paper, embellishments, and more.

Thanks for stopping by!

Thursday, June 8, 2017

Papertrey Ink Traveler's Journal: Currently, Dividers, and Dashboards

This is my second post today. For Reverse Confetti's June Creative Hop, scroll down or click HERE.


Hi there, I'm excited to share with you today a Traveler's Journal project I've got in the works for Papertrey Ink.


It all started with a new stamp set, Traveler's Journal: Currently, and coordinating word die set, Traveler's Journal: Currently Words. The set has the words "currently," "right now," and "today," plus a whole bunch of prompts, such as loving, hating, reading, watching, texting, improving, dreading, etc.

My mother often gives me a hard time for not sending her enough pictures of my kids, so I decided to send her not just pictures, but also a glimpse into their world right now using some of those prompts from Traveler's Journal: Currently. One thing led to another, and I realized that I would like something similar. I ended up making a whole Traveler's Journal with quarterly Q&A pages for each of my kids. Here's an example: 


On the left side, I have a current photo, along with ten prompts, and on the right, those prompts are filled out based on my youngest son. I stamped the page with images from Boho Rounds in spring colors, then stamped similar pages for each season.


Summer


Fall


Winter


Since all three kids will appear in this one journal, I wanted to divide the journal into three sections.


I decided on a very simple initial (Wet Paint Alphabet dies) on a circle (Traveler's Journal: Accessories) placed on the right of the page with just a slight overhang to make circular divider tabs.


You can see all three in this photo, as well as the Boho Rounds stamping I did on the cover.


I pre-stamped all the pages, but didn't want to glue down the photo frames yet, since I'll be adding the photos over the next year. I decided to add a laminated dashboard with an envelope to store all the extra frames and labels.


Dashboards are basically like wraps, either decorative or functional, that protect your traveler's journals, as well as give you a place to stick and/or store things. I like to laminate them because it makes the whole notebook a little more sturdy and durable.


To make the dashboard, I cut two pieces of Aqua Mist Stripe paper at 4.5" square, then placed them into a laminating pouch with about a half-inch gap in between.


On the inside I added the storage envelope in Aqua Mist card stock. The frames and labels were done with Traveler's Journal: Accessories dies, the words are Traveler's Journal: Currently stamps and Traveler's Journal: Currently Words dies, and the envelope is the Traveler's Journal: Envelope die. 

And then last, I'm keeping this journal in a Traveler's Journal: Outer Cover made out of Aqua Mist felt. 


Stamps: Boho Rounds, Traveler's Journal: Currently

Dies: Traveler's Journal: Accessories, Currenty Words, Envelope, and Outer Cover; Wet Paint Lowercase Alphabet

Ink: VersaMark; Aqua Mist, Hawaiian Shores, Tropical Teal, Summer Sunrise, Canyon Clay, Autumn Rose, Scarlet Jewel, Green Parakeet, New Leaf, Winter Wisteria, Blueberry Sky, True Black, Classic Kraft, Fresh Snow

Paper: Traveler's Journal: Page Blanks; Aqua Mist,  Scarlet Jewel, Autumn Rose, Summer Sunrise, Tropical Teal, Melon Berry, Canyon Clay, Green Parakeet, Winter Wisteria card stock; Ombre Stripes, Super Succulents, Aqua Mist Stripe patterned paper;

Other: Traveler's Journal: Black Elastic Cord, Aqua Mist Felt, laminator


That's it for me. I'm looking forward to filling up this notebook over the next year!

For more Traveler's Journal inspiration, visit the Traveler's Journal team:

Nichole Heady
Heather Nichols
Andi Schalow
Stephanie Gold