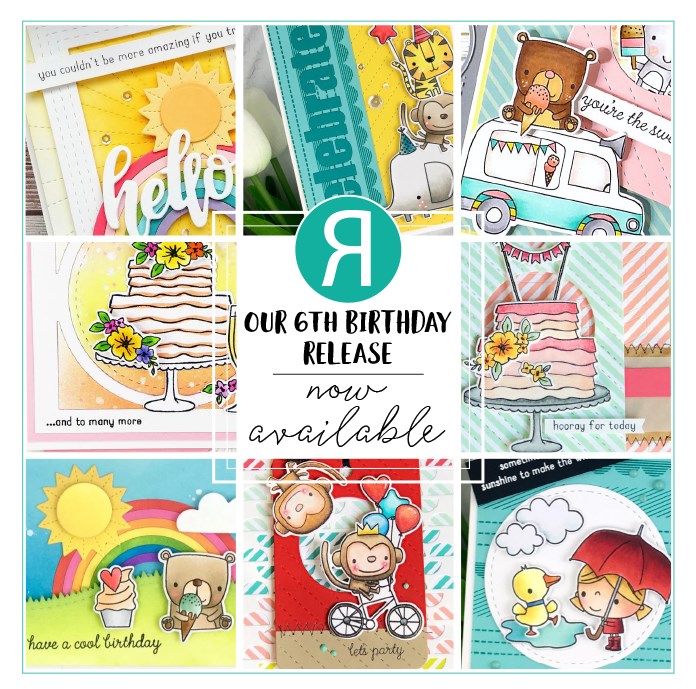
Hello friends! Last week, Reverse Confetti celebrated its SIXTH birthday with a new release (and the best one to date!). My projects were featured during the countdown on the Reverse Confetti blog, but in case you didn't catch them there, I'm sharing them today. The new products are so much fun to play with!
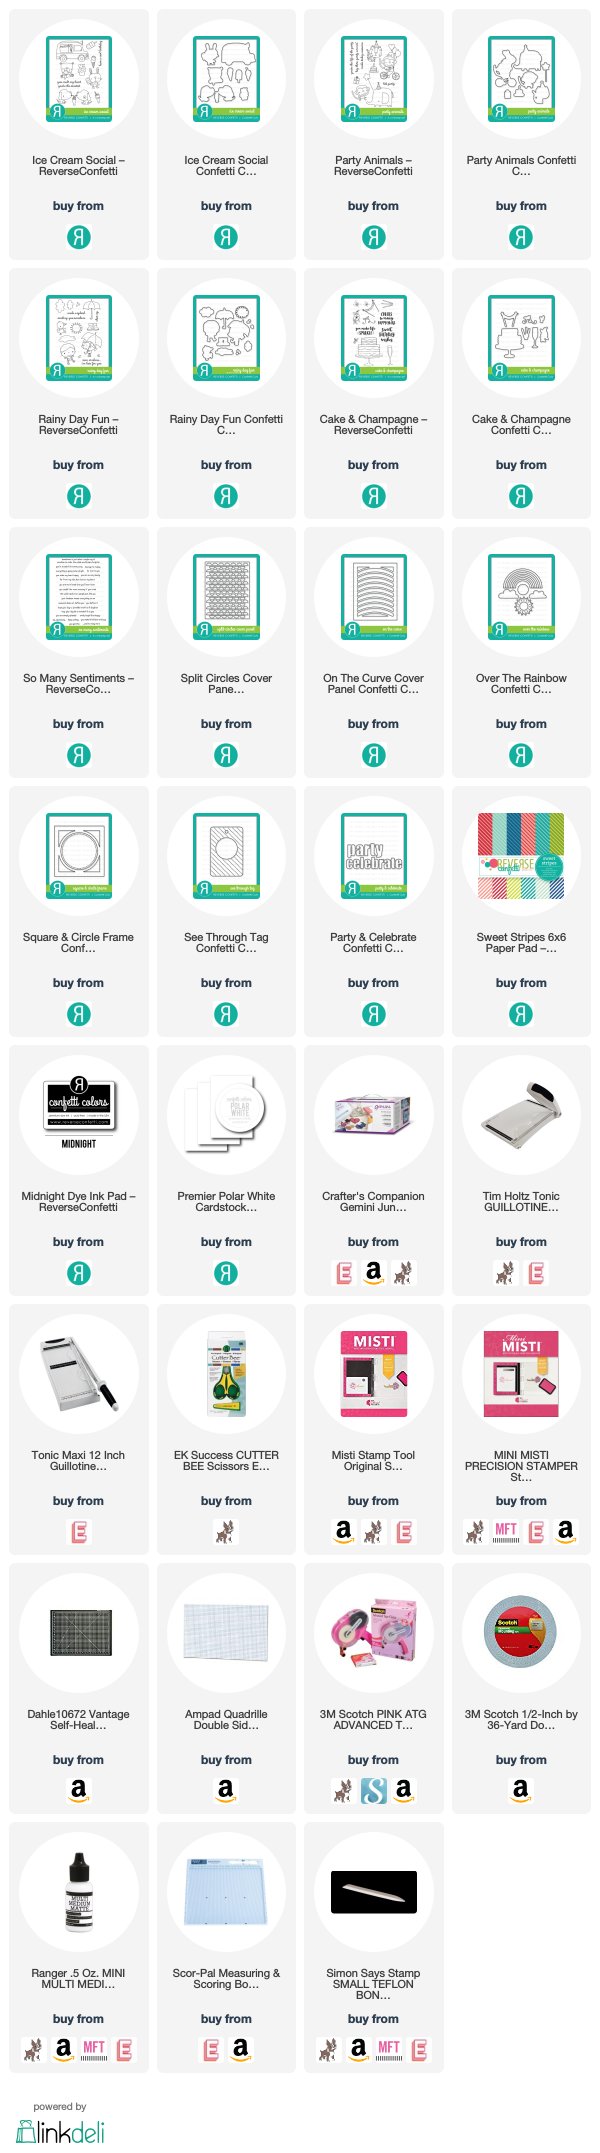
Stamps: Ice Cream Social
Confetti Cuts: Ice Cream Social, Square & Circle Frame, Over the Rainbow
Pattern Paper: Sweet Stripes, Fun Times
Stamps: Party Animals
Confetti Cuts dies: Split Circles Cover Panel, Celebrate & Party
Paper Pad: Sweet Stripes
Stamps: Rainy Day Fun
Confetti Cuts dies: See Through Tag, Stitched Note & Frames
Pattern Paper: Cue The Confetti, Fun Times
Stamps: So Many Sentiments
Confetti Cuts dies: On the Curve Cover Panel, Over the Rainbow
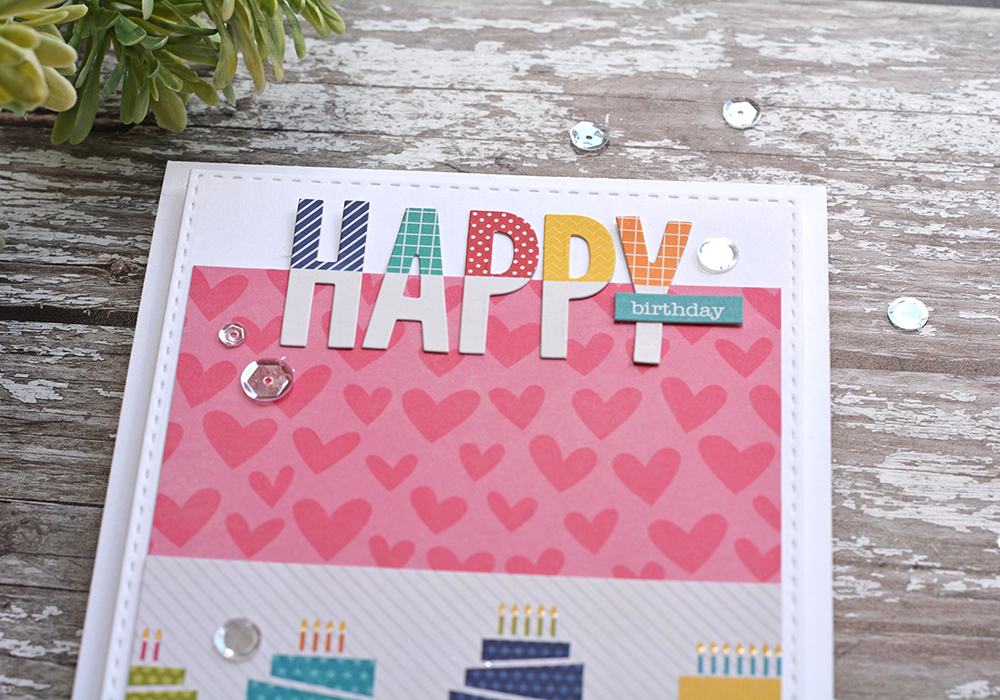
Hi there, just stopping in today to share a set of cards featuring an adorable stamp set by Jillibean Soup: YOU MAKE MISO HAPPY. This set is part of the bigger You Make Miso Happy collection.
For all three of today's cards, I've used masking to achieve different results. Masking is a great way to add visual depth without adding bulky layers to your card. For this first card, I've used masking to create this row of overlapping succulents. Here’s a quick video I did last week for Jillibean Soup's YouTube channel. Be sure to subscribe to the Jillibean Soup channel for some fantastic tips on everything from cards to scrapbooking to DIY home decor.
For this first card, I started by stamping the images I wanted to appear in the front, then masked those off before stamping the background plants. Also, by stamping the images in lots of different shades of green, it looks like I’ve used a lot more than just three unique plant images.
For all three cards, I used Distress Oxide inks. The pigment quality of these inks gave me great ink coverage, solid impressions, plus a whole assortment of greens. I've only used my Distress Oxide inks for backgrounds before, so it was fun to use them for stamping.
To add interest and get more mileage from this set, I stamped a row of the XOXO sentiment in light gray ink, trimmed it down, and placed it behind the succulent border, leaving just the bottoms of the letters showing. Instead of being a readable sentiment, it becomes a background pattern. The sentiment is a diecut from the YOU MAKE MISO HAPPY PEAPOD PARTS, and the butterfly and heart images are from the same YOU MAKE MISO HAPPY stamp set.
I’ve used masking on these next two cards as well. For this card, I stamped a trio of pots and plants in the same color scheme as above.
Next, I cut three pots out of masking paper and placed them over the stamped pots. I added a horizontal strip of masking tape and then did some ink-blending to create a horizon line.
Last, I chose a sticker from the YOU MAKE MISO HAPPY COORDINATING STICKERS to add a pop of bright yellow.
My last card features the same images and colors, but this time as a background. A rare (for me) one-layer card, too!
I mixed and matched pots, plants and colors for lots of variety. Once all the plants were stamped, I masked off the pots and added ink-blending to ground each plant.
My final steps were to add the crisp black stamped sentiment and some gray ink splatter.
Do you have a favorite of the three? I think mine is this last one!
Hello friends, wanted to pop in and share another card I made last month with FLEUR IMPRESSIONS and COMFORTING COMMANDS from The Greetery. These sets are both sold out currently, but you can sign up to be notified when they are back in stock.
For this card, I made a wreath design using multiples of just one of the floral images in FLEUR IMPRESSIONS. This particular image has the perfect natural bend for wreath-making.
I placed everything on a medium gray background. For added interest, I splattered with white paint and did some light ink blending around the perimeter with white pigment ink.
But first, a quick tip: many of The Greetery's first release products sold out quickly (congratulations Betsy!). Be sure to sign up for email notifications for the products you're interested in, that way you'll be the first to know when those items are back in stock.
I had so much fun stamping various color combos for these layered flowers. Each flower image has either two or three layers, plus the centers (and not including the leaves). These pinks and reds look especially beautiful against the crisp white background!
There are four different scripture sentiments in Comforting Commands. Of the five cards I've made so far, three of them used "be still and know." I didn't do that on purpose, so it's interesting to see how that one Scripture seemed to emerge as my favorite. It's been a difficult year so far, so it certainly resonates! For this card, I stamped in black pigment ink and heat embossed in clear for a little extra pop.
I just *love* these two sets!
Have a great rest of the week!
Affiliate links used where available at no extra charge to you. Many thanks for your support!