Wednesday, April 13, 2016

Color Pop Butterflies


Welcome to the second group post for Papertrey's April release countdown. Today we are introducing Color Pop Butterflies, the newest Make It Market mini kit by Betsy Veldman. Just like Color Pop Florals from a couple of months ago, this collection includes stamps, dies, a paper pack, and a three-step stencil collection.

The April release will be available at 10 pm EST on April 15 in the Papertrey Ink store.


I absolutely love the way all of these products work together! Product design at its best for sure. For this first card, I've used a little bit of everything in the kit. First I used the stencils and sponge daubers to add color to the butterflies and flowers on one of the Color Pop Butterflies paper patterns. Next, I used the stamps to add the details to the sponged areas. "So happy" is die-cut and colored with Copics and "for you" is stamped on a tiny sentiment flag die-cut. The flower trio and pair of leaves that anchor the sentiment flag are pre-printed designs that are included in the paper pack. 


StampsColor Pop Butterflies

Dies: Color Pop Butterflies

Ink: Summer Sunrise, Orange Zest, Terracotta Tile, Limeade Ice, New Leaf, Aqua Mist, Tropical Teal, Hibiscus Burst, Raspberry Fizz, Scarlet Jewel

Paper: Stamper's Select White, Color Pop Butterflies paper pack

Other: Color Pop Butterflies stencils, sponge daubers, Copic markers, white thread, fun foam


For this next card, I went in a totally different direction, color-wise. I needed a card for a family that is going through a difficult time right now, and thought the butterflies and a sentiment from Betsy's Inspired: Faith would work together as a beautiful message of hope.


The large butterfly is stamped and die-cut, the smaller butterfly and the flowers are sponged through the stencils, then stamped with the details.


I popped up the Soft Stone panel to give that framed circle element some dimension. The Soft Stone panel is stamped with some subtle white lines using one of the stamps in Plaid Builder.


Last, I embellished with a few sequins and some Pinefeather Baker's Twine.


StampsColor Pop Butterflies, Plaid Builder

DiesColor Pop Butterflies, Shaker Shapes: Circle, Branching Out

Ink: Lavender Moon, Autumn Rose, Aqua Mist, Stormy Sea, Fresh Snow

Paper: Stamper's Select White, Soft Stone, Stormy Sea, and Pinefeather card stock; vellum card stock

Other: Pinefeather Baker's Twine, sequins, foam tape, sponge daubers


For more Color Pop Butterflies inspiration, visit the Papertrey team:


Tuesday, April 12, 2016

Fathers, Food Fun, and More


The Papertrey April release countdown continues today with our first group post featuring some darling and innovative food-themed stamps and dies.

All of the new products will be available at 10 pm EST on April 15 in the Papertrey Ink store.


Lizzie Jones designed this first collection of products. So awesome for masculine projects! We have King of the Grill, which is a super clever take on the burger, as well as a fry box and popcorn bucket  dies, along with stamps and dies for decorating your treat boxes.

Let me show you how I've put them together:


First, the Favor It: Fry Box. I die-cut mine out of Kraft card stock, stamped the Boxed Background Stripes in white, then added a cute tag done with Treat Box Tag Lines stamps and the Treat Box Tag die. For some color and contrast, I added a large Enchanted Evening circle on the inside of the box. That was die-cut with the previously released Pint Size Wrap die.


StampsBoxed Background Stripes, Treat Box Tag Lines

DiesTreat Box Tag, Favor It: Fry Box, Pint Size Wrap

Ink: Fresh Snow, Enchanted Evening, Green Parakeet, Canyon Clay

Paper: Stamper's Select White, Classic Kraft, and Enchanted Evening card stock

Other: foam adhesive, cellophane back, jute twine, button


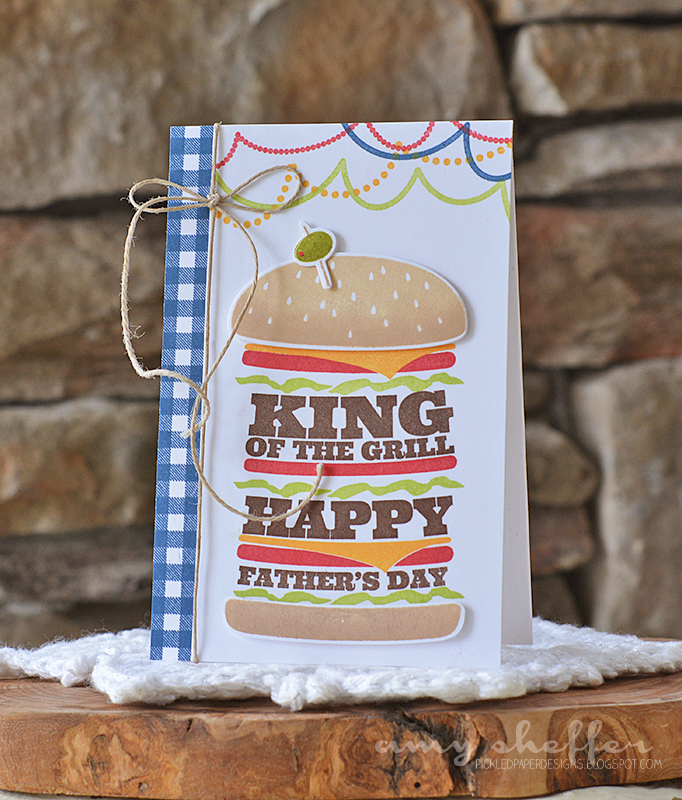
King of the Grill is sooooo flippin' cute! The different layers allow you to build all sorts of burger combinations with various burger ingredients. Soooo, so fun! The top and bottoms of the bun, as well as the olive, as die-cut, the other ingredients are stamped directly onto the card base. Your burger can be as big or small as you like!


Along the top, I stamped some colorful streamers from Birthday Style, and along the left, I added an Enchanted Navy Background Basics: Super Gingham border.


Here's another look at the different burger layers.


StampsKing of the Grill, Birthday StyleBackground Basics: Super Gingham

DiesKing of the Grill

Ink: Enchanted Evening, Green Parakeet, Fine Linen, Classic Kraft, Dark Chocolate, Pure Poppy, Summer Sunrise, Ripe Avocado

Paper: Stamper's Select White card stock

Other: jute twine


 Next up is another really cute and clever idea, this one designed by Erin Lincoln:


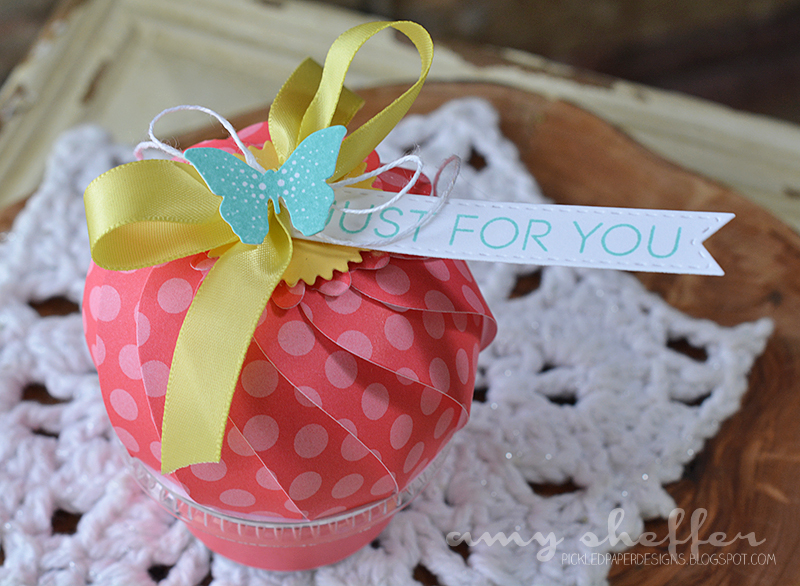
It starts with little snack cups that you find in the grocery store. Erin has come up with a Snack Cup Wrap die, an easy die to wrap the cup, as well as a darling Paper Puff Topper to turn the snack cups into adorable cupcakes. (Erin has also designed a Snack Cup Box that some of the other designers will be showing today.)


I wrapped each cup, topped with Paper Puff Toppers, then embellished with Limeade Ice bows, Keep It Simple: Just For You tags, and Bitty Butterflies.


The Paper Puff Toppers are cut in two pieces. I used the Berry Sorbet, Harvest Gold, and Hawaiian Shores pattern packs.


These are so sweet and assemble quickly! The cups are perfect for small treats -- mints, jelly beans, brownie bites, nuts/seeds, and much more.


StampsKeep it Simple: Just for You, Bitty Butterflies

Dies: Snack Cup Wrap, Paper Puff Topper, Cover Plate: Bitty Butterflies, Tag Sale: Quilted

Ink: Harvest Gold, Hawaiian Shores, Berry Sorbet

Paper: Stamper's Select White, Berry Sorbet, Harvest Gold, and Hawaiian Shores card stock; Berry Sorbet, Harvest Gold, and Hawaiian Shores paper packs

Other: Limeade Ice ribbon, white linen thread, snack cups


Thanks for visiting! For more Food Fun, visit the Papertrey team:


Monday, April 11, 2016

Introducing Splits: Get Well Soon

[For my Moments Inked Planner newsletter post, please click HERE.]

Hello, friends, Papertrey's April release countdown is underway! We have a fabulous release planned for April 15 and lots to share between now and then!

All of the new products will be available at 10 pm EST April 15 in the Papertrey Ink store.


Today I have the pleasure of introducing Splits: Get Well Soon. This is the third in a fabulous series designed by Maile Belles.


So take a look at that darling image! I love how it shows both the sun and the rain. Splits: Get Well Soon comes with the the basic image, the get well soon sentiment, a filler image for adding color and pattern to the sun, and a pair of raindrops for stamping some extra rain. 


Here, I've created a delightfully CAS card: I just stamped the main image in black on white card stock, added some rain drops, and popped up a second die-cut sentiment on foam tape. The popped up die-cut has been stamped with the extra sun image.


Stamps: Splits: Get Well Soon

Dies: Splits: Get Well Soon

Ink: True Black, Aqua Mist, Bright Buttercup

Paper: Stamper's Select White and Soft Stone card stock

Other: foam adhesive, W00 and W0 Copic markers


The main Splits: Get Well Soon image also works well with so many other Papertrey products -- keep reading for just a few ideas!


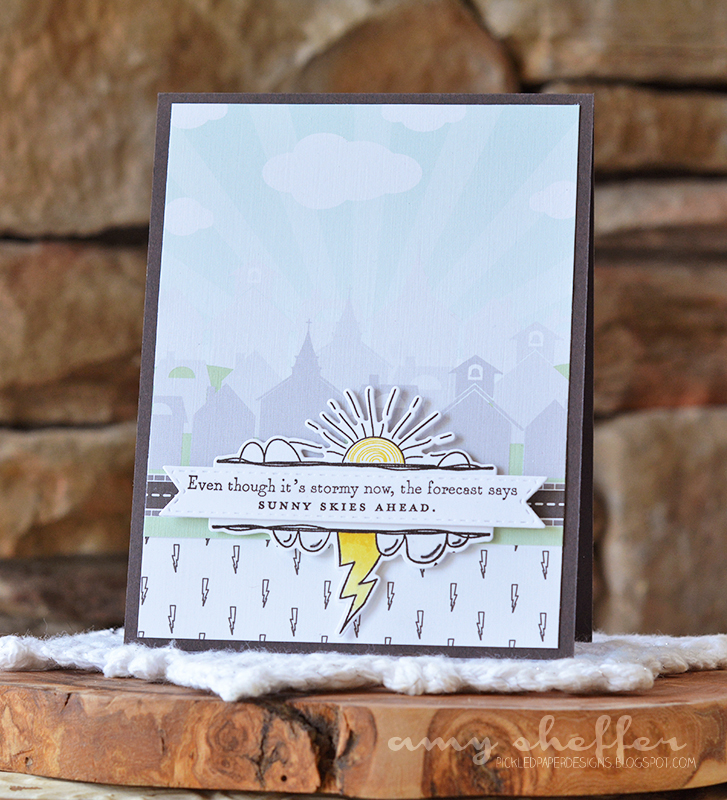
Here, I've stamped a sentiment from Rainy Day Sentiments onto a Tag Sale: Quilted banner strip die-cut, and added it to the Splits: Get Well Soon die-cut. I popped this up onto some papers from the Petite Places and So Striking patterned paper collections.


It's like this sentiment and this image were made for each other! I also like the imagery on the papers, even the road suggests you're going from the storm right into the rising sun.


StampsSplits: Get Well Soon

DiesSplits: Get Well Soon

Ink: True Black, Bright Buttercup

Paper: Stamper's Select White and Smokey Shadow card stock; Petite Places and So Striking pattern paper collections

Other: foam adhesive, W00 and W0 Copic markers


Here's another fun combo with a previously released stamp set. This sentiment is from Blue Skies. I've framed the stamped panel with pieces from a new frame die designed by Erin Lincoln. She has two frame dies this month, the one I used is the Cover Plate: Marquee die. Like her previously released Pretty Frame and Scroll Frame, these new frames have separate elements that make combining colors super easy. It's also like getting multiple frame dies for the price of one!


I stamped the rainbow lines using one of the images in Plaid Builder. The rainbow gives a nice look at some of the new PTI colors, too -- Bright Buttercup, Green Parakeet, and this month's Amethyst Allure.


StampsSplits: Get Well Soon

DiesCover Plate: Marquee

Ink: True Black, Pure Poppy, Orange Zest, Bright Buttercup, Green Parakeet, Hawaiian Shores, Blueberry Sky, and Amethyst Allure

Paper: Stamper's Select White and Hawaiian Shores card stock; Hawaiian Shores Polka Dot pattern paper

Other: True Black baker's twine


And last is another sweet CAS card:


All I've done here is stamp the bottom half of the image in True Black ink onto a cloud pattern from Maile's So Striking paper collection. 


I added a few sequins, some twine, and a strip of True Black Stripe patterned paper for a border. I don't think you can see this well in the picture (I can hardly see it when I'm holding the card in my hand!) but I added tiny drops of Glossy Accents to the rain drops, too.


StampsSplits: Get Well Soon

Ink: True Black

Paper: So Striking, True Black Stripe

Other: True Black baker's twine, clear sequins, Glossy Accents


Thanks so much for joining me today! For more of today's countdown, please visit Nichole's blog.

Moments Inked Planner: Custom Goal-Tracking Pages

[For my April release countdown post, featuring Splits: Get Well Soon, please click HERE.]


Hello, Monday! Today I have a planner idea to share with you. I've designed some goal-tracking pages for my Moments Inked Planner by Papertrey, Ink. As you'll see, I am using the binder format planner this year, but all of these inserts can be created for the spiral planner as well. You'll just use the spiral version of the full-page die instead of the binder version.

I tend to be an all-or-nothing kind of girl, so when 2016 rolled in, I went all-out with my goal setting, as in pages of notes and plans on my computer. Whenever I could, I used the SMART goal method -- S = specific, M = measurable, A = attainable, R = relevant (or realistic), and T = time-bound. At the end of the year, I want to see the specific things I did to achieve my different goals, instead of just vague more-of-this, less-of-that goals.

A few weeks ago, I was reviewing my progress and saw that I've fallen behind in some areas. I'm hoping the goal-tracking pages I designed for my planner will help keep me on track and motivated.

I looked through my stamps to find some basic geometric shapes that I could use for my page designs. These first two pages both use large outline shapes from Two Toned:


With four large rectangles, this page would be great for anything you want to accomplish quarterly, or anything where you'd want to record a lot of info.


I'm using this page to record family mini-vacations and day trips. With kids in sports year-round, my family has precious few weekends when everyone is free, so our family outings have definitely dwindled over the years. It's still important to me that we make time for these adventures. I'm hoping this visual status report will be a helpful reminder to plan for these trips!


Ink: Aqua Mist, Green Parakeet, Raspberry Fizz, Canyon Clay

Paper: Fresh Snow Linen card stock, True Black Stripe patterned paper


I love the hexagon shape, also in the Two Toned stamp set. Like the rectangles above, these spaces are large enough to fit any details you want to include in your goal-tracking. 


I'm using the hexagon pages to track my book-reading goal. This version is much simpler than my book-reading log from last year!


Ink: Aqua Mist, Green Parakeet, Raspberry Fizz, Canyon Clay

Paper: Fresh Snow Linen card stock, True Black Stripe patterned paper


Next is a page with twelve spaces, perfect for tracking things you want to do once a month.


One of my once-a-month goals is to purge and donate to charity. I love the organizations that pick up my donations right off of my front porch! This would be a great place to add a planner pocket, too, for storing donation receipts until tax time.

(By the way, does it bother you that there are two orange circles right next each other?.... yep, me too!  You know I'm going to have to re-do that whole page, right?)


Ink: Aqua Mist, Green Parakeet, Raspberry Fizz, Canyon Clay

Paper: Fresh Snow Linen card stock, True Black Stripe patterned paper


Next up is a page with twenty small circles (with room for more) to fill in, stamp, add a checkmark to, etc. I didn't find a circle stamp in my collection that was this approximate size, so instead, I used a Cover Plate: Circles die-cut as a stencil.


I'm using this page to track my weight loss goal of 20 pounds for the year. The "you did it" stamp was a happy find in my stamp collection! It's from Retro Style Graduation.


Ink: Green Parakeet, Raspberry Fizz

Paper: Fresh Snow Linen card stock, True Black Stripe patterned paper


This is the same as above, but with one extra row, for 25 circles total. I stamped the insides of these circles with an image from Retro Style Birthday.


I'm using this page to track a lettering practice goal of twice a month. The check-mark is from Moments Inked: Posted.


Ink: Aqua Mist, Green Parakeet, Raspberry Fizz, Canyon Clay

Paper: Fresh Snow Linen card stock, True Black Stripe patterned paper


 I had so much fun making these pages, and can totally see myself with a separate binder just for goals! (Fewer goals would work, too - HA!) It's always surprising, and kind of embarrassing even, how motivated I am by the simple act of checking off a box or filling in a blank space.

Thanks for stopping by, and I hope I've given you some ideas for customizing your planner!